
If you use Avid Pro Tools for music production, recording, editing or mixing, there's a good chance you're only scratching the surface of what the DAW can actually do.
Pro Tools has been around for decades, and that long development history means it contains an enormous number of features, shortcuts, editing tools and workflow options. Some are obvious, while others are tucked away in contextual menus, Preferences, the Edit window or relatively obscure parts of the interface. And some of these "hidden" Pro Tools features can save hours over the course of a project.

The latest version, Pro Tools 2026.4.1, is the current release as of July 2026. While 2026.4.1 itself is primarily a maintenance release containing bug fixes, it follows the substantial workflow improvements introduced in Pro Tools 2026.4, including Track Pin, Batch File Rename, improved Clip List filtering, new Duplicate Track options and several other productivity enhancements.
So, if you're a music producer looking to become faster in Pro Tools, what are the features you should actually know about?
Here are some of the best Pro Tools workflow features, shortcuts and lesser-known tools that can help you spend less time operating your DAW and more time making music.
1. Track Pin: Keep Important Tracks Permanently in View
Where to find it: Edit window → Track controls/contextual options
One of the most useful new additions to Pro Tools 2026 is also one of the simplest. Track Pin allows you to lock one or more tracks into position in the Edit window so that they remain visible while you scroll through the rest of your session.
Avid introduced Track Pin in Pro Tools 2026.4 specifically to address the problem of navigating increasingly large sessions. This might sound like a minor convenience, but consider what a modern music production session can look like.
You might have:
-
20 drum tracks
-
8 bass tracks
-
15 guitars
-
10 synths
-
20 vocal tracks
-
Several effects tracks
-
Multiple buses
-
Instrument tracks
-
Parallel processing tracks
-
Mix and master tracks

Once you get into a session containing 100+ tracks, constantly scrolling up and down becomes incredibly inefficient.
Track Pin allows you to keep your most important tracks visible while navigating everything else. For example, you could pin your Lead Vocal, Drum Bus, Bass Bus and Mix Bus.
Now you can scroll through your guitar tracks without losing sight of the vocal or mix bus. Avid also points out that Track Pin can temporarily bring tracks together for an edit without changing their physical organisation in the session.
Why it's useful for producers
Track Pin is particularly useful when editing a specific instrument while needing to monitor another track. For example, pin your drum bus while editing individual drum tracks. Or pin the lead vocal while working through backing vocals.
It's a simple way of making a huge Pro Tools session feel considerably more manageable.
2. Batch Rename: Rename Multiple Tracks or Clips at Once
Where to find it: Select tracks or clips → contextual menu → Batch Rename
Renaming tracks individually might not seem like a major problem, until you've got 80 of them.
Pro Tools' Batch Rename functionality allows you to rename multiple tracks or clips simultaneously instead of manually changing every name. This becomes even more useful in Pro Tools 2026.4.
For Pro Tools Studio and Ultimate, Avid added the ability to batch rename the underlying disk files as well as clips. The new Clip List filtering options also make it easier to isolate whole-file clips before carrying out the operation.
Imagine you've received a recording session containing:
Audio 01Audio 02Audio 03Audio 04
Instead of painstakingly renaming everything individually, you can use batch operations to organise the material much more efficiently.
This is particularly useful when preparing sessions for:
-
Another producer
-
A mix engineer
-
A mastering engineer
-
A recording studio
-
A live performance
-
An archive
-
A client
A particularly useful production habit
Try developing a consistent naming system from the beginning of a project.
For example:
DR_KickDR_SnareDR_OH_LDR_OH_RBASS_DIGTR_LGTR_RVOX_LEAD
Good session organisation isn't glamorous, but it can save enormous amounts of time later.
3. Clip List Filtering Makes Huge Sessions Easier to Manage
Where to find it: Edit window → Clip List
The Clip List can become enormous during a recording project, particularly if you have recorded multiple takes of vocals, guitars, drums or other instruments. After hours of recording and editing, you can easily end up with hundreds of clips and audio files competing for your attention.
Pro Tools 2026.4 introduced new Clip List filtering options that make it easier to distinguish between whole-file clips and subclips. These filtering options are available across Pro Tools tiers, while the ability to batch rename disk files is restricted to Studio and Ultimate.
This can be particularly helpful when you are organising a large recording session. If you need to locate the original full-length recordings rather than the smaller edited clips created during production, filtering the Clip List can save you from manually searching through everything.
The result is a much more manageable session, particularly when you have recorded a large number of takes.
4. Memory Locations Are More Powerful Than Simple Markers
Where to find it: Window → Memory Locations
A lot of producers use Memory Locations simply to mark song sections.
For example:
Verse 1
Chorus 1
Verse 2
Bridge
Final Chorus
That's already useful, but Memory Locations can become much more powerful when you use them as part of your navigation workflow. Instead of manually scrolling through the timeline looking for a particular section, you can jump straight to it.
This is particularly useful when you're producing a song with a complicated arrangement.
You might create locations for:
Intro
Verse
Pre-Chorus
Chorus
Instrumental
Bridge
Outro
Now your entire song effectively has a set of navigation points.
Take it further
You can also use Memory Locations to help create different working views of a session. For example, create a location for your vocal editing area, another for drum editing and another for the final mix section. The more organised your Memory Locations become, the less time you spend navigating.
5. Tab to Transients Is a Secret Weapon for Editing
Where to find it: Edit window → Tab to Transients
If you're editing drums, you absolutely want to know about Tab to Transients.
Instead of manually clicking around a waveform trying to find the beginning of each drum hit, Pro Tools can detect transient information and move your insertion point between transients.
This can dramatically speed up:
-
Drum editing
-
Percussion editing
-
Guitar editing
-
Vocal editing
-
Sample creation
-
Rhythmic audio manipulation
-
Removing unwanted noises
Imagine you need to cut a kick drum out of a recording. You could zoom in, find the waveform peak, click, separate the clip and repeat. Or you can use transient navigation to move rapidly from hit to hit, once you've learnt the associated keyboard shortcuts, the difference can be enormous.
This is one of those Pro Tools features that demonstrates why keyboard-based editing is so much faster than relying entirely on a mouse.
6. Clip Groups: Move Entire Musical Parts Together
Where to find it: Select clips → Clip menu → Group
Suppose you've built a four-bar drum fill using several tracks.
You have:
-
Kick
-
Snare
-
Toms
-
Overheads
-
Room microphones
You want to move the fill to another part of the song. Moving every individual clip manually is tedious and introduces the possibility of something becoming misaligned.
Clip Groups allow you to combine multiple clips into a single editable group.
You can then move the entire musical section as one unit.
This is useful for:
-
Drum fills
-
Backing vocals
-
Guitar sections
-
Layered percussion
-
Sound-design elements
-
MIDI and audio arrangements
Clip Groups are particularly useful during arrangement because they allow you to experiment with moving complete musical ideas rather than individual pieces of audio.

7. Clip Gain Can Save You From Endless Volume Automation
Where to find it: Clip Gain line / Clip Gain controls
If you've got a vocal where one phrase is noticeably louder than another, you don't necessarily need to immediately reach for volume automation.
Clip Gain allows you to adjust the level of individual audio clips before the signal reaches your plug-in chain.
This is incredibly useful when preparing vocals for compression.
For example:
Quiet phrase → increase Clip Gain
Loud phrase → reduce Clip Gain
Compressor → receives a more consistent performance
This means the compressor isn't having to work quite so hard to compensate for massive level differences.
Clip Gain is also useful for:
-
Reducing breaths
-
Controlling individual words
-
Fixing inconsistent guitar notes
-
Balancing drum hits
-
Removing sudden volume spikes
-
Preparing dialogue
It's one of the simplest ways to make your editing and mixing process more efficient.
8. AudioSuite Lets You Process Audio Without Keeping the Plug-In Running
Where to find it: AudioSuite menu
AudioSuite is one of Pro Tools' most useful features for producers who want to keep sessions efficient. Unlike a conventional insert plug-in, an AudioSuite plug-in processes selected audio and writes the result to the clip.
That makes it particularly useful when you want to process a specific piece of audio rather than an entire track.
For example, you might use AudioSuite to:
-
Reverse a sound
-
Pitch-shift a clip
-
Apply EQ
-
Apply compression
-
Normalise audio
-
Process a vocal phrase
-
Manipulate individual sound effects
Imagine you have one vocal word that needs a specific EQ adjustment, you could automate a plug-in or create additional routing, or you could simply select the word, apply the AudioSuite process and move on.
That can make a surprisingly large difference when you're performing detailed editing.
9. Track Presets: Build Your Favourite Channels Once
Where to find it: Track menu → Track Presets
If you repeatedly build the same kind of channel, stop rebuilding it from scratch.
Track Presets allow you to save configurations that you can recall later.
For example, you could create a Lead Vocal Track Preset containing your preferred:
-
EQ
-
Compressor
-
De-esser
-
Reverb send
-
Delay send
-
Routing
-
Plug-in configuration
You could then create presets for:
Lead Vocal
Backing Vocal
Kick
Snare
Bass
Electric Guitar
Acoustic Guitar
Synth
Drum Bus
This doesn't mean every song needs to sound identical. Instead, you're creating a starting point.
The creative decisions still come afterwards, but you're not wasting ten minutes rebuilding the same basic routing every time. Interestingly, Pro Tools 2026.4.1 also fixes an issue involving Track Presets containing Melodyne, making this an especially relevant area to keep in your workflow.
10. Duplicate Tracks Gives You More Control Than You Might Realise
Where to find it: Track menu → Duplicate Tracks
Duplicating a track is useful when you want to experiment without destroying your original work. But Pro Tools 2026.4 expanded the Duplicate Tracks dialogue with additional options, including whether to duplicate Track Comments, Elastic Audio and ARA assignments.
This is particularly useful during production: Imagine you've got a guitar track with a complex plug-in chain and Elastic Audio processing, you want to experiment with a completely different version. Duplicate the track and choose exactly which associated information should come across.
You can then create:
Guitar – Original
and
Guitar – Experimental
Without risking the original performance. This encourages experimentation while keeping your session organised.
11. Commit Tracks When a Session Gets Heavy
Where to find it: Track menu → Commit
At some point, almost every large Pro Tools session becomes CPU-intensive.
You might have dozens of virtual instruments, software synths and plug-in chains running simultaneously.
That's where Commit becomes extremely useful.
Commit renders the processing on a track into audio, allowing you to reduce the amount of real-time processing required.
It's particularly useful for:
-
Virtual instruments
-
Software synths
-
CPU-heavy effects
-
Guitar processing
-
Sound-design chains
-
Complex vocal processing
Instead of leaving ten CPU-hungry plug-ins running for the entire production, you can commit tracks once you're happy with them.
And Pro Tools 2026.4 added another useful workflow option: the Mute Source Track option in the Track Commit dialogue.
That gives you another way of controlling how the original source behaves after committing.
12. Track Freeze Can Give Your CPU a Break
Where to find it: Track menu → Freeze
Track Freeze is useful when you want to temporarily render processing without committing to a permanent change.
This is especially useful with software instruments and complicated plug-in chains.
For example, you might have a synth patch running through:
Synth → Saturation → Chorus → Delay → Reverb → EQ
If the chain is consuming significant CPU, freezing the track can reduce the processing burden while allowing you to continue working elsewhere.
This is particularly useful during the later stages of production when your session becomes more complicated.
Rather than immediately bouncing everything down or removing plug-ins, freeze the tracks you aren't currently editing.
13. Missing Plug-Ins: Generate a Report Instead of Hunting Through the Session
Where to find it: Missing Plugins dialogue
This is a particularly useful Pro Tools 2026.4 workflow improvement.
If you open a session containing plug-ins that aren't installed on your computer, Pro Tools can tell you which plug-ins are missing.
In 2026.4, the Missing Plugins dialogue can also save a text-file report.
That might sound insignificant, but it's incredibly useful when exchanging sessions.
Instead of taking screenshots or manually writing down missing plug-ins, you can generate a report and send it to another engineer or producer.
For studios working across multiple computers, this can save a lot of administrative hassle.
14. Make Your Favourite Elastic Audio or ARA Plug-In Easier to Access
Where to find it: Track Elastic Audio/ARA selector
Another small but useful 2026.4 improvement is the ability to Cmd-click on macOS or Ctrl-click on Windows on an Elastic Audio or ARA plug-in in the list to make it a favourite, in the same way you can work with plug-in inserts.
This is one of those tiny workflow improvements that becomes valuable when you use the same processor repeatedly. If you regularly work with a particular Elastic Audio or ARA plug-in, you can make it much quicker to access.
Again, the philosophy is simple: Anything you repeatedly search for should be made easier to reach.
15. The Solo Status Button Can Save a Menu Trip
Where to find it: Edit window → Solo Status button
Pro Tools 2026.4 added another small but useful improvement: the Solo Status button in the Edit window can be used to set Solo Mode without opening the Options menu.
This is a perfect example of the type of change that doesn't necessarily revolutionise Pro Tools but can make everyday operation faster.
If you're constantly switching solo behaviour while editing and mixing, having the control directly accessible means fewer trips through menus.
16. Insertion Follows Playback: A Small Setting With a Big Workflow Impact
Where to find it: Options menu
Insertion Follows Playback is one of those Pro Tools settings that can either become an essential part of your workflow or something you never touch. When enabled, Pro Tools can move the insertion point according to playback behaviour, making it easier to continue editing from where you've been listening.
This can be particularly useful when you're repeatedly auditioning small sections of a song. Interestingly, Pro Tools 2026.4 included a fix specifically addressing Insertion Follows Playback when used with Link Track and Edit Selection, so the combination behaves correctly in situations involving clips during playback or recording.
If you haven't experimented with the setting before, it's worth trying.
17. Link Track and Edit Selection Can Reduce Unnecessary Clicking
Where to find it: Options menu
Link Track and Edit Selection is another deceptively simple feature.
When enabled, selecting material in the Edit window can also affect the corresponding track selection. This can be useful when moving between editing and mixing.
Instead of repeatedly selecting the clip, then finding the track, then changing another selection, Pro Tools can keep these actions linked. It's particularly helpful when editing large sessions where your attention constantly moves between the timeline and track controls.
18. Use Keyboard Shortcuts for the Jobs You Perform Hundreds of Times
This is arguably the biggest Pro Tools workflow improvement of all.
Learn the shortcuts for the actions you perform repeatedly.
Think about what you do during a typical production session.
You might:
-
Start and stop playback
-
Record
-
Zoom
-
Separate clips
-
Trim audio
-
Undo
-
Redo
-
Navigate between sections
-
Create fades
-
Change edit modes
-
Move between tracks
-
Open windows
-
Create selections
-
Edit MIDI
-
Create Memory Locations
If you use a mouse for every one of those operations, you're constantly moving your hand between the keyboard and the screen. Keyboard shortcuts eliminate much of that movement.
Avid's Pro Tools documentation includes dedicated keyboard and mouse shortcuts covering areas such as playback, recording, editing, navigation, fades, MIDI editing, automation, Memory Locations and more. And Pro Tools even displays keyboard shortcuts alongside many menu commands, making it possible to learn them gradually as you work.
The trick isn't to memorise every Pro Tools shortcut in one afternoon. Instead, learn the 10–20 shortcuts you use constantly.
Then gradually add more.
Editors Keys: Make Pro Tools Shortcuts Easier to Learn
If you're serious about becoming faster in Pro Tools, the biggest barrier isn't necessarily finding the shortcuts. It's remembering them.
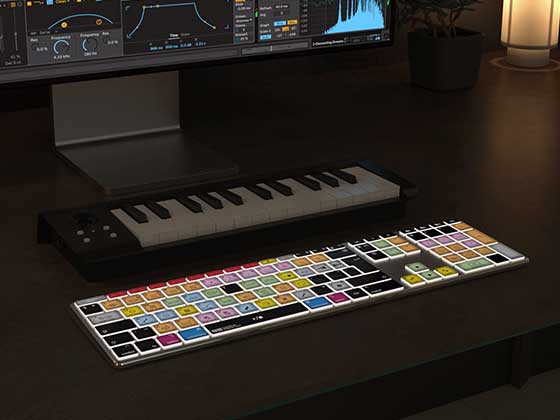
That's where a dedicated Editors Keys shortcut keyboard or keyboard cover can be extremely useful. Editors Keys creates shortcut keyboards and keyboard covers specifically for creative software, allowing important commands to be printed directly onto the keys.
For a Pro Tools user, this turns the keyboard into a visual shortcut reference.
Instead of stopping your workflow to think: "What was the shortcut for that again?"
You can look directly at the relevant key, this is especially useful when you're learning Pro Tools.
Shortcut keyboards can help build muscle memory
The ultimate aim isn't to spend your entire career looking down at the keyboard.
It's the opposite, a shortcut keyboard can help you learn the shortcuts until you no longer need to look. You initially see the command printed on the key, you use it repeatedly. Your brain begins associating the command with the key position and eventually, your hands simply move there automatically. That's muscle memory!
And once Pro Tools shortcuts become second nature, editing can become dramatically faster.

What about a keyboard cover?
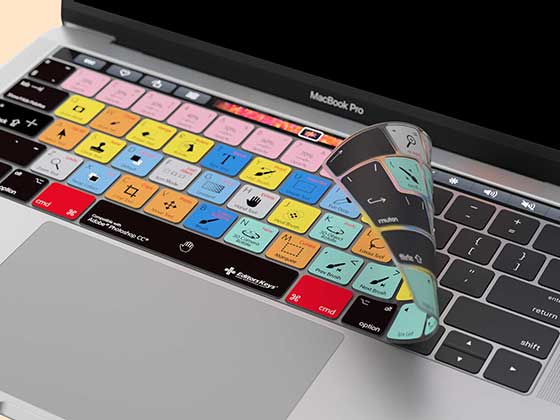
If you already have a keyboard that you like, a shortcut keyboard cover can be a convenient alternative. Rather than replacing the keyboard, the cover places the relevant shortcut information directly over the keys.
This can be particularly useful for producers who work on a Mac or move between different workstations. The important thing is that the shortcuts remain visible when you're learning them.
Why Keyboard Shortcuts Matter So Much in Music Production
It's easy to underestimate how much time is lost through tiny actions. Suppose a particular editing task takes five seconds with a mouse but one second using a keyboard shortcut.
That doesn't sound significant, but now imagine performing that task 500 times during an album. You've just saved roughly 33 minutes on that one operation, and that's only one shortcut. Across an entire production, the accumulated time savings can become substantial. More importantly, shortcuts preserve creative momentum.
Music production is highly dependent on flow.
You hear an idea.
You want to edit it.
You want to audition something.
You want to move a section.
You want to try another take.
Every time you stop to search through a menu, that creative process gets interrupted.
A keyboard-driven workflow keeps you closer to the music.
The Best Pro Tools Workflow Is About Removing Friction
The most useful Pro Tools features aren't necessarily the ones that look impressive in a feature list.
They're the ones that remove small obstacles from your workflow.
Track Pin stops you endlessly scrolling through huge sessions.
Memory Locations make navigation almost instantaneous.
Tab to Transients speeds up rhythmic editing.
Clip Groups let you manipulate entire musical sections.
Clip Gain can save you from excessive automation.
Track Presets eliminate repetitive setup.
Commit and Freeze help keep demanding sessions manageable.
Batch Rename makes session organisation dramatically faster.
And keyboard shortcuts tie all of these ideas together.
Pro Tools 2026.4.1 is a good example of this philosophy. The latest release includes important fixes and refinements, while the 2026.4 feature release introduced a collection of workflow improvements designed to make large, complex sessions easier to manage.
The fastest Pro Tools users aren't necessarily the people who know every single feature.
They're the people who have built a workflow where the things they do hundreds of times a day require almost no thought.
That's the real secret.
Final Thoughts: Stop Clicking and Start Producing
Pro Tools is an incredibly deep DAW, and even experienced users can continue discovering new features, shortcuts and workflow tricks that make everyday production faster. If you've been using Pro Tools for years, one of the best ways to improve your workflow is to look at the tasks you perform repeatedly and ask yourself whether there is a quicker way to do them.
Start by identifying five actions that you perform constantly during a typical session, such as separating clips, navigating around the timeline, creating fades, zooming, selecting tracks or opening particular windows. Find the keyboard shortcut for each of those actions and make a conscious effort to use the shortcut every time. Once those commands become familiar, move on to another handful of shortcuts and gradually build up your knowledge rather than trying to memorise the entire Pro Tools shortcut list at once.
Combining keyboard shortcuts with features such as Track Pin, Memory Locations, Clip Groups, Track Presets, Clip Gain and Batch Rename can make a substantial difference to the way you work. Instead of repeatedly navigating menus or carrying out the same tedious processes manually, you can build a workflow where many of the actions you perform throughout a session become almost automatic.
An Editors Keys Pro Tools shortcut keyboard or keyboard cover can also make this learning process considerably easier by putting important commands directly in front of you while you work. Rather than having to stop and search for a shortcut every time you forget it, you can simply look at the relevant key, use the command and continue working. With enough repetition, those shortcuts gradually become familiar enough that you no longer need to look at the keyboard at all.
Ultimately, the aim isn't simply to memorise as many Pro Tools shortcuts as possible. The real benefit comes when using Pro Tools becomes almost instinctive: your hands know which commands to use, your attention remains focused on what you're hearing, and you can make edits and creative decisions without constantly thinking about how to operate the software.
The less time you spend navigating menus, searching for tracks and performing repetitive tasks, the more time you have to concentrate on the music itself. By combining Pro Tools' hidden workflow features with a strong knowledge of keyboard shortcuts, you can create a faster, more efficient production environment that allows you to spend less time clicking and more time producing.