
Starting video editing can feel overwhelming. You open an editing programme such as Adobe Premiere Pro, DaVinci Resolve or Final Cut Pro, import your footage and suddenly find yourself looking at timelines, bins, tracks, effects, transitions and dozens of tools that you have no idea how to use. The good news is that you don't need to understand every feature of your editing software to make a good video!
When you're editing your first project, the most important skills are much simpler: choosing your best footage, putting clips in a sensible order, cutting away unnecessary material, getting your audio right, making your shots look consistent and checking the finished edit before you export it.
Whether you're editing a holiday video, YouTube video, vlog, short film, social media project or footage you've shot on your phone, the basic process is remarkably similar. Once you understand that process, you can gradually introduce more advanced editing techniques as your skills develop.
This beginner's guide will take you through the process of editing your first video from start to finish.

1. Choose Your Video Editing Software
Before you can start editing, you'll need a video editing programme.
There are plenty of options available, including Adobe Premiere Pro, DaVinci Resolve, Final Cut Pro and CapCut. The interface and specific tools will vary between programmes, but the fundamental editing process is broadly the same.
You'll generally have a media area where your footage is stored, a viewer where you can preview clips, and a timeline where you assemble your video.
Don't worry about learning every button before you begin. One of the easiest ways to learn video editing is to start making something and learn the tools you actually need as you go.
For your first project, concentrate on the fundamentals:
-
Importing video footage
-
Organising clips
-
Adding clips to a timeline
-
Cutting and trimming footage
-
Arranging clips into a sequence
-
Adding music
-
Adjusting audio levels
-
Making basic colour adjustments
-
Adding simple text
-
Using straightforward transitions
-
Reviewing your edit
-
Exporting the finished video
These basic skills are enough to create a complete video.
2. Organise Your Video Footage
Before you start editing, get all of your footage onto your computer and into your editing programme.
If you've filmed a holiday, for example, you might have hundreds of individual clips. You probably won't need all of them.
This is one of the first important lessons in video editing: more footage doesn't necessarily mean a better video.
Go through your clips and look for the moments that are actually worth showing. Perhaps you've filmed a beautiful view, someone laughing, an interesting building, a great shot of the hotel, an establishing shot of the location or a particularly memorable moment.
At the same time, you'll probably find plenty of footage that isn't useful.
You might have accidentally filmed the floor, recorded several seconds before you were ready to shoot, moved the camera around while deciding what to film or captured a shaky shot that doesn't really contribute anything.
Don't feel that you have to use these clips simply because you filmed them.
Think of your footage as a box of ingredients. Your job as the editor is to select the best ingredients and turn them into something coherent.
Don't be afraid to leave footage out
If you have 200 clips, perhaps only 30 or 40 of them are genuinely useful. That's completely normal.
A large part of video editing is deciding what not to include.
The more footage you shoot, the more important this becomes. Professional editing isn't about finding a way to include everything you've filmed. It's about finding the material that best communicates your story, idea or experience.
3. Import Your Clips Into Your Editing Programme
Once you've selected your footage, import it into your chosen video editing software.
You'll usually be able to see your clips in a media browser, project panel or library. From there, you can preview them before adding them to your timeline.
The terminology differs between editing programmes, but the principle is the same.
Your imported footage is your collection of raw material. The timeline is where you turn that raw material into a finished video.
If you're completely new to video editing, spend a little time familiarising yourself with the interface before worrying about advanced effects.
Find your:
-
Media or project browser
-
Preview window
-
Timeline
-
Audio tracks
-
Video tracks
-
Playhead
-
Basic trimming tools
-
Export controls
You don't need to memorise everything immediately. You'll become familiar with the interface naturally as you edit more projects.
4. Start Building Your Timeline
Now comes the fun part: putting your footage together.
Start by adding your best clips to the timeline in roughly the order that you want them to appear. Don't worry about making everything perfect straight away.
At this stage, you're essentially creating a rough version of your video.
Think about what the viewer needs to see first, what happens next and where the video eventually ends.
For example, imagine you're editing a holiday video. You might structure it like this:
Leaving home → Airport → Flight → Arrival → Hotel → Beach → Exploring → Dinner → Sunset → Going home
You don't necessarily need narration explaining every single event. The footage itself can communicate the story.
A shot of someone packing a suitcase tells us you're leaving. A shot of an airport departure board tells us you're travelling. A shot of the hotel establishes where you've arrived.
This is one of the fundamental principles of editing: you're telling a story through images.
Even a simple collection of holiday footage becomes much more interesting when the shots have a logical progression.
5. Learn the Most Important Editing Skill: Cutting
Once you've assembled your rough timeline, it's time to start cutting.
This is arguably the most important part of learning how to edit video.
Imagine you've filmed someone walking towards a beach and your camera recorded 30 seconds of the journey. Do you really need to show all 30 seconds?
Probably not.
Perhaps the most interesting part is the moment they reach the beach and the camera reveals the view. You might only need three to five seconds of the original recording.
Everything before that can be removed.
Don't feel obligated to use everything you filmed
One of the most common beginner video editing mistakes is thinking:
"I filmed it, so I need to include it."
You don't.
Your job as the editor is to show the best version of the footage. If the first ten seconds of a clip consist of somebody getting into position before they start speaking, cut it.
If the end of a clip contains several seconds of the camera being lowered, remove it.
If a shot begins with the camera moving around while you're trying to frame the subject, remove that section too.
The viewer doesn't need to see all the preparation that happened before the useful part of the shot.
Keep your video moving
Another common mistake is leaving clips on screen for too long.
A beautiful beach might look great, but you don't necessarily need to show it for 20 seconds.
Instead, you could show a few seconds of the beach, cut to your friends, cut to some food, show another location and then return to the beach during a later part of the video.
You're giving the viewer small pieces of the experience rather than documenting every second of the trip.
This is particularly important for YouTube videos, travel videos, vlogs and social media content, where keeping the viewer engaged is often a major part of the editing process.

6. Add Music That Matches the Video
Once your basic edit is coming together, you can add music.
The right music can dramatically change the atmosphere of a video.
An upbeat track might work well for an energetic holiday montage, while slower music might be more appropriate for a relaxed or reflective sequence.
The important thing is to choose music that supports the footage rather than distracting from it.
There are numerous music licensing services available for creators, including platforms such as Epidemic Sound and Artlist.
Don't make your music too loud
This is particularly important when your video contains dialogue.
If somebody is speaking, the audience should be able to understand what they're saying without having to concentrate on their voice underneath the music.
Music should generally sit underneath the dialogue rather than compete with it.
A useful habit is to listen to your edit on headphones and then check it through your computer speakers or another playback system. Something that sounds balanced through headphones can sometimes feel very different through speakers.
Pay particular attention to:
-
Dialogue volume
-
Music volume
-
Sudden changes in loudness
-
Background noise
-
Distortion or clipping
-
Whether voices remain clear
Remember that music doesn't have to be present throughout the entire video either. Sometimes silence is more effective.
7. Clean Up Your Audio
Good video editing isn't only about what the viewer sees. Audio is equally important.
A beautiful video can become difficult to watch if the dialogue is difficult to understand or the background noise is distracting.
Most modern video editing programmes include audio tools that can help reduce unwanted background noise. If you've recorded dialogue in a noisy environment, some basic noise reduction can make the recording considerably easier to listen to.
You should also watch out for audio clipping. If a recording is too loud and has distorted, reducing its volume won't necessarily restore the missing audio quality.
In some cases, it may be better to remove unusable audio altogether and use music, ambient sound or another recording instead.
You don't need to hear everything
Video can often communicate information visually.
If your footage clearly shows somebody arriving at the beach, you don't necessarily need a voice saying, "We're at the beach."
The audience can understand what's happening from the images.
This can give you more flexibility when editing. You can remove awkward dialogue, unwanted background noise or unnecessary commentary while still allowing the visuals to tell the story.
8. Make Your Colours Consistent
After cutting your footage and getting your audio into shape, look at the overall appearance of your video.
You may notice that your clips don't all look the same.
One camera angle might be brighter than another. One clip might look warm and orange while another looks noticeably blue. Some footage may have stronger colours while another shot appears washed out.
You don't need to become a professional colourist to improve your first video.
For a beginner project, concentrate on making the clips look as though they belong together.
If one shot is too dark, brighten it slightly.
If another looks excessively blue, make it a little warmer.
If the colours look weak, a small increase in saturation can help.
The key word here is consistency.
Basic colour correction can make a collection of clips from different moments feel much more cohesive.
As you become more experienced, you can learn about professional colour grading, LUTs, colour spaces, scopes and more advanced correction techniques. But those aren't requirements for making your first good video.
9. Add Simple Text and Titles
Text can be useful for introducing a video, identifying a location or providing additional information.
For example, a travel video might begin with:
Our Holiday in Spain – 2026
You don't need an elaborate title sequence.
Choose a clean, readable font and make sure the text is large enough to read easily. Keep the design consistent with the style of your video.
One of the easiest mistakes to make as a beginner is discovering that your editing programme contains hundreds of text animations and immediately wanting to use them all.
Try to resist that temptation.
Simple text can often look more professional than an overly complicated title covered in animations and effects.
10. Don't Go Overboard With Transitions
Video editing software can contain an enormous number of transitions.
When you're new to editing, it can be tempting to experiment with all of them.
Spinning cubes, page curls, explosions, elaborate wipes and animated transitions might look impressive when you first discover them, but they can quickly become distracting.
In most situations, a simple cut is all you need.
Think about television dramas and documentaries. Shots can change constantly without the viewer consciously noticing the transition.
That's generally what you want.
The audience should be paying attention to the story, subject or action rather than thinking about the editing software being used.
When should you use a fade?
A fade can be useful when you deliberately want to communicate a change in time or mood.
For example, you might finish a sequence showing a sunset, fade to black and then begin the next sequence the following morning.
The transition has a purpose.
That's a useful principle to remember:
Don't add an effect simply because you can. Add it because it helps the video.

11. Watch Your Entire Edit Before Exporting
Once you've finished editing, don't immediately export the video.
Watch the entire thing from beginning to end.
More importantly, try to watch it from the perspective of someone who has never seen the original footage.
Ask yourself:
-
Is anything boring?
-
Is any clip too long?
-
Does the story make sense?
-
Can I hear everyone clearly?
-
Is the music too loud?
-
Does the music suit the footage?
-
Does anything feel out of place?
-
Are there unnecessary shots?
-
Is there anything missing?
-
Are the colours consistent?
-
Are there any obvious mistakes?
It can also be useful to leave the project for a while and return to it later.
After spending hours editing the same sequence, you're likely to become accustomed to things that might stand out immediately to somebody seeing the video for the first time.
Coming back to the project the next day can give you a fresh perspective.
If possible, getting somebody else to watch the finished edit can be even more useful. They may notice something that makes perfect sense to you because you know the context, but doesn't make sense to someone who wasn't there.
This final review stage can make a surprisingly large difference to the finished video.
12. Add or Remove Shots During Your Final Review
Don't think of your first complete timeline as the finished product.
Editing is an iterative process.
You might watch your video and realise that you've mentioned something without showing it. Perhaps you've talked about a particular feature of a camera but haven't actually included footage demonstrating that feature.
Add the shot.
Alternatively, you might realise that a section takes too long to get to the point.
Cut it.
You may even discover that an entire sequence doesn't contribute anything to the video.
Remove it.
A good edit is often the result of repeatedly watching, adjusting, cutting and refining rather than getting everything perfect on the first attempt.
13. Export Your Finished Video
Once you're happy with the edit, it's time to export.
Exporting converts your editing project into a normal video file that you can watch, upload to YouTube, send to friends or share online.
The exact export settings you need depend on where you're going to use the video.
You don't need to understand every technical setting when you're just starting out.
Most modern editing programmes provide presets for common destinations such as YouTube and social media platforms. These are a straightforward starting point for beginners.
Choose a suitable high-quality setting, give your file a sensible name and export the video.
As you gain experience, you can learn more about resolution, frame rates, codecs, bitrates, compression and different delivery formats.
For your first project, the important thing is simply to finish it.
14. Learn Video Editing Shortcuts
Once you've started editing regularly, one of the biggest ways to speed up your workflow is to learn keyboard shortcuts.
Instead of constantly moving your mouse between the timeline and menus, shortcuts allow you to perform many common editing operations directly from the keyboard.
This can make trimming, cutting, navigating the timeline and managing your project considerably faster.
The problem for beginners is that there can be a lot of shortcuts to learn.
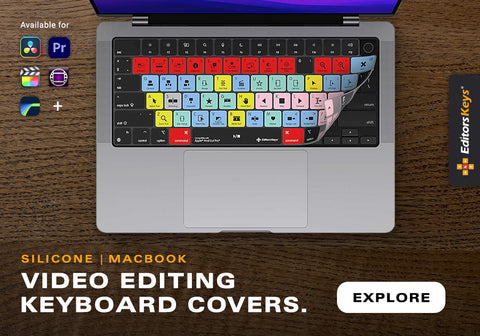
That's where an Editors Keys shortcut video editing keyboard can help.
Editors Keys Shortcut Video Editing Keyboards
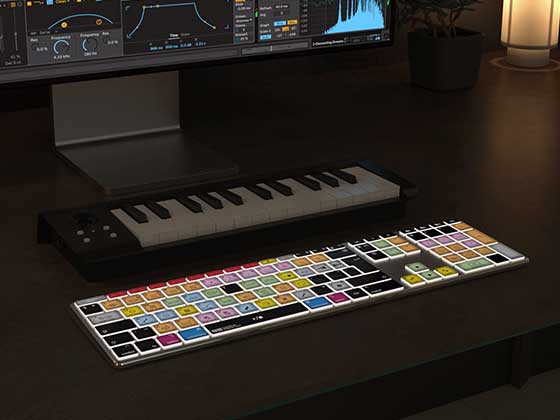
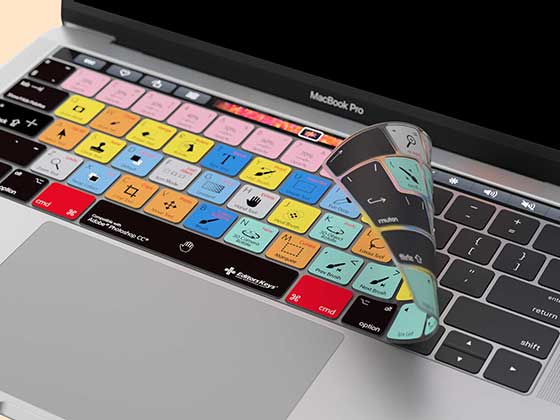
Editors Keys shortcut keyboards are designed specifically for video editors, with important shortcuts for popular editing software mapped directly onto the keys.
Rather than having to memorise a long list of keyboard commands or constantly search through menus, the shortcuts are printed on the keyboard itself.
This makes it much easier to see which key performs which function while you're learning.
Editors Keys keyboards are available for popular video editing software including Adobe Premiere Pro, Final Cut Pro and DaVinci Resolve, giving you a keyboard designed around the workflow of your chosen editing programme.
The idea is particularly useful when you're starting out because you can gradually learn the shortcuts through everyday use. Instead of trying to memorise dozens of commands before you begin editing, you can simply look at the keyboard when you need a particular function.

That can help you build muscle memory naturally over time.
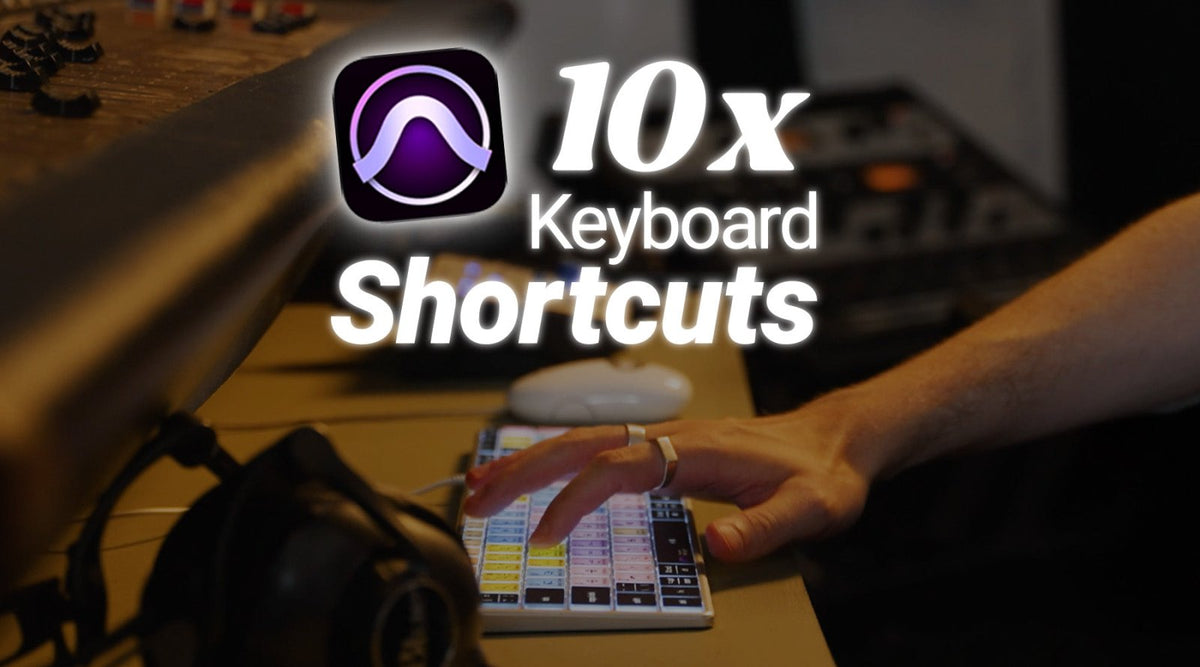
The video covered this approach directly, highlighting how having editing shortcuts printed on the keys can make them easier to learn while helping editors work faster.
Many Editors Keys models also feature backlighting, which is useful if you edit in a darker room or regularly work at night. Wired versions also provide a straightforward connection without relying on Bluetooth or needing to recharge the keyboard.
For anyone who is serious about learning video editing, shortcuts are worth learning early. You don't need to memorise every command immediately. Start with the functions you use most frequently and build from there.
15. The Best Way to Learn Video Editing Is to Edit
It's easy to spend weeks watching tutorials without ever actually making anything.
Tutorials are useful, but eventually you need to open your editing software and start cutting footage.
Your first video probably won't be perfect.
That's completely fine.
Your second video will give you a better understanding of pacing. Your third might teach you more about audio. Eventually, you'll become comfortable with colour correction, titles, transitions, effects and more advanced editing techniques.
The important thing is to keep making projects.
Start with something simple. A short holiday montage, a few minutes of footage from a day out, a basic YouTube video or a collection of clips from a camera test can all become useful editing practice.
Every project gives you another opportunity to practise selecting footage, cutting clips, improving audio, building a sequence and telling a story.
A Simple Video Editing Workflow for Beginners
If you're overwhelmed by everything involved in video editing, keep this basic workflow in mind:
1. Import your footage
Bring your video clips, photos and audio into your editing programme.
2. Select your best clips
Remove footage that is unusable, repetitive or simply doesn't contribute to the video.
3. Build a rough timeline
Put your clips into a logical order and establish the basic story.
4. Trim aggressively
Remove unnecessary beginnings, endings, pauses and boring sections.
5. Improve the pacing
Keep the video moving and make sure clips stay on screen for an appropriate amount of time.
6. Add music
Choose music that matches the mood and supports the footage.
7. Balance your audio
Make sure dialogue remains clear and music doesn't overpower it.
8. Correct the colour
Make your clips look consistent rather than worrying about complicated cinematic grading.
9. Add simple titles
Use clean, readable text where it is useful.
10. Keep transitions simple
Use cuts most of the time and transitions only when they serve a purpose.
11. Watch the entire video
Look for anything boring, confusing, too long, too quiet, too loud or out of place.
12. Make your final changes
Add missing shots and remove anything that doesn't improve the video.
13. Export
Choose an appropriate high-quality preset and create your finished video.
14. Watch it again
Once you've exported, give the finished video another watch. You may spot something you want to change before sharing it.
Start Editing Your First Video Today
Learning how to edit video doesn't require you to understand every feature in Premiere Pro, DaVinci Resolve, Final Cut Pro or any other editing programme.
The fundamentals are surprisingly straightforward: choose the best footage, arrange it into a story, cut away the unnecessary material, make your audio and colours consistent, keep effects under control and review the finished edit carefully.
As you become more confident, you can start exploring more advanced techniques such as colour grading, motion graphics, sound design, visual effects and professional editing workflows. But don't let the advanced features distract you from the fundamentals. Your first goal should simply be to take your raw footage and turn it into a finished video.
And once you start editing regularly, learning keyboard shortcuts is one of the easiest ways to make the process faster. Editors Keys shortcut video editing keyboards put important Premiere Pro, Final Cut Pro and DaVinci Resolve shortcuts directly on the keys, helping you learn your software while you edit and gradually build the muscle memory needed for a faster workflow. The more you edit, the more natural the process becomes. Start with your footage, make your first cut and learn from every project you finish.
Be sure to watch our full Youtube video on editing your first video below!