

Panasonic has released firmware update 2.1 for the Lumix S9, bringing several useful improvements for photographers and videographers. The update introduces new video recording options, expanded customisation for the lens function button and compatibility with LUMIX Flow version 1.7.0 or later. If you own a Lumix S9, updating your camera is a straightforward process that only takes a few minutes.
CLICK HERE to download the firmware update
In this guide, we'll explain what's included in the Panasonic Lumix S9 firmware 2.1 update and walk you through the entire installation process, from downloading the firmware file to checking that the update has installed correctly. You don't need any specialist equipment or previous experience with camera firmware updates.

What's New in Panasonic Lumix S9 Firmware 2.1?
One of the biggest additions in firmware 2.1 is the introduction of new recording options, particularly for video creators. The Lumix S9 can now record 4K video at 60fps and 50fps using the MP4 (Lite) recording format. There are also new Full HD recording options, including 100fps and 120fps, giving videographers more flexibility when capturing fast-moving subjects or creating slow-motion footage.
Frames per second (FPS) refers to how many individual frames a camera captures every second. Recording at higher frame rates allows you to slow footage down during editing while maintaining smoother playback. For example, recording at 120fps and placing the footage on a 24fps editing timeline gives you the option to create smooth five-times slow motion.
Panasonic has also expanded the functions that can be assigned to the camera's lens function (Fn) button. These include Hybrid Zoom, Crop Zoom, image stabilisation, focus peaking, focus ring control and video recording. Having these options available through a customisable button makes it easier to access frequently used settings without navigating through multiple menus.
Finally, firmware 2.1 introduces compatibility with LUMIX Flow version 1.7.0 or later, providing additional options for users who incorporate Panasonic's mobile production tools into their video workflow.

What You'll Need Before Installing the Update
Before downloading and installing the new firmware, make sure you have everything ready. You'll need your Panasonic Lumix S9 camera, a fully charged battery and an SD card with enough available storage for the firmware file. You'll also need access to a computer, either Windows or Mac, and an SD card reader if your computer doesn't have a built-in card slot.
It's particularly important to back up any photographs or video footage stored on your SD card before starting. The installation process involves formatting the card, which permanently erases its existing contents. Transfer anything you want to keep onto your computer or another storage device before proceeding.
Step 1: Download the Panasonic Lumix S9 Firmware
The first step is downloading the firmware directly from Panasonic's official support website. Visit the Panasonic Lumix firmware download page and locate the Lumix S9 firmware section.
Select the download for firmware version 2.1, making sure you choose the correct file for your camera model. Download the firmware package onto your computer. The download will arrive as a compressed ZIP file, so you'll need to extract its contents before transferring it to your SD card.
Once extracted, you should have a firmware file named S9___V21.bin. This is the actual file your camera needs to install the update. Keep it somewhere easy to find, such as your desktop or Downloads folder, as you'll need it shortly.
Step 2: Format Your SD Card
With the firmware downloaded and extracted, it's time to prepare your SD card. Insert the card into your Lumix S9 and switch the camera on.
Press the Menu button and navigate to the Setup menu. Find the Format option and select it. The camera will ask you to confirm that you want to format the card. Remember that this will erase everything currently stored on it, so double-check that you've backed up any important footage and photographs.
Once formatting has finished, switch the camera off and remove the SD card. You can now insert it into your computer using its built-in SD card slot or an external card reader.

Step 3: Transfer the Firmware File to Your SD Card
Open the SD card on your computer and locate the firmware file you extracted earlier, S9___V21.bin.
Copy this file directly onto the main directory of your SD card. This is important because the camera needs to locate the firmware file when you start the installation. Don't place it inside another folder or rename the file, as this could prevent the camera from recognising it.
Once the transfer has finished, safely eject the SD card from your computer. You now have everything prepared for the installation.

Step 4: Install Firmware 2.1 on Your Lumix S9
Before starting the installation, check that your camera battery is fully charged. Losing power during a firmware update could interrupt the process and potentially cause problems with your camera.
With the camera switched off, insert the SD card containing the firmware file. Switch the Lumix S9 back on and press the Menu button.
Navigate to the Setup menu and find the Firmware Version option. Select it and look for the Firmware Update option. Your camera should automatically detect the firmware file stored on the SD card and allow you to begin the update.

Follow the on-screen instructions to start the installation. Once the process begins, leave the camera alone until it has finished. Don't press any buttons, switch the camera off, remove the SD card or take the battery out. Interrupting a firmware installation can cause serious problems, so allow the camera to complete the process without interference.
The installation should only take a few minutes. Once completed, the Lumix S9 will automatically restart, indicating that the update process has finished.
Step 5: Check That the Firmware Update Was Successful
After your camera has restarted, it's worth checking that the new firmware has installed correctly.
Press the Menu button, return to the Setup menu and select Firmware Version again. The version displayed on your camera should now read 2.1.
If you can see firmware version 2.1, the installation has been successful and your Lumix S9 is ready to use with its new recording options and features.
You can now explore the additional MP4 (Lite) recording settings, customise your lens Fn button and take advantage of the expanded LUMIX Flow compatibility.

Improve Your Video Editing Workflow with Editors Keys
Once you've updated your Lumix S9 and started capturing more footage, the next step is making your editing workflow as efficient as possible. Whether you're working with 4K footage, creating slow-motion sequences or putting together longer video projects, having quick access to your editing software's keyboard shortcuts can save considerable time.
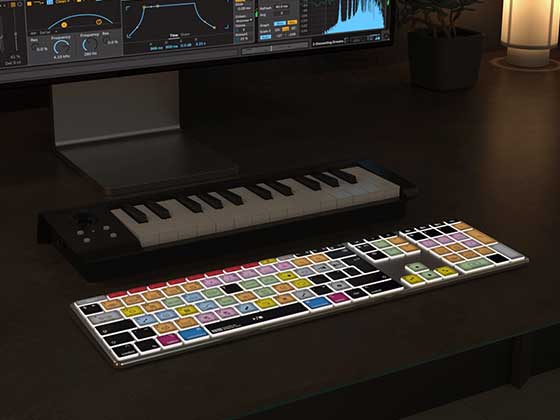
At Editors Keys, we manufacture specialist shortcut editing keyboards and silicone keyboard covers designed for popular video and audio editing software. Each keyboard features the relevant software shortcuts printed directly onto the keys, making it easier to find commands, learn new shortcuts and work more efficiently without constantly referring to online shortcut guides.
Our range includes the AB10 Air Wireless Backlit Shortcut Keyboard, which combines wireless connectivity with adjustable backlighting, and the AB10 Core Wired USB-C Backlit Shortcut Keyboard, offering a reliable wired connection and illuminated shortcut keys.

We also offer silicone shortcut keyboard covers for compatible keyboards, featuring clearly printed shortcuts for your favourite editing applications. These provide a convenient way to transform an existing keyboard into a dedicated editing tool, while also helping protect against dust, dirt and minor liquid spills.
Whether you're editing Panasonic Lumix S9 footage in Adobe Premiere Pro, Final Cut Pro or DaVinci Resolve, an Editors Keys shortcut keyboard or silicone cover can help speed up your workflow and make learning essential editing commands much easier.
Be sure to watch our full Youtube video below!