
If you've ever imported i-Log or LOG footage into DaVinci Resolve for the first time, you've probably had the same reaction as many editors.
"Why does my footage look so grey and lifeless?"
The good news is that this is completely normal. In fact, that flat, washed-out appearance is exactly how LOG footage is designed to look. Rather than creating a finished image straight out of the camera, LOG recording preserves as much detail as possible in both the highlights and shadows, giving you far more flexibility when it comes to colour grading.
In this guide, we'll walk through a simple workflow for transforming flat i-Log footage into rich, cinematic-looking video using DaVinci Resolve. Whether you're editing travel films, weddings, documentaries, YouTube videos or commercial projects, these techniques will help you achieve a more polished, professional look.
Why Does LOG Footage Look Flat?
Before jumping into the colour grade, it's worth understanding why your footage looks the way it does.
Unlike standard video profiles that already have contrast, saturation and sharpening applied, LOG footage is intentionally recorded with:
-
Low contrast
-
Low saturation
-
Soft highlights
-
Preserved shadow detail
-
Maximum dynamic range
The purpose is simple: to capture as much information from the camera sensor as possible.

This extra image data gives you far more room to manipulate colours during post-production without degrading image quality. It also allows you to recover highlight and shadow detail that would otherwise be clipped in standard video profiles.
If you've ever tried heavily colour grading footage shot on a phone or in a standard picture profile, you've probably noticed colours quickly begin to break apart or look unnatural. That's because much of the image processing has already been "baked in" by the camera.
LOG footage gives you a clean canvas instead.
Why Use LUTs in DaVinci Resolve?
One of the quickest ways to transform LOG footage is by applying a LUT (Look-Up Table).
A LUT acts as a starting point for your colour grade, converting the flat LOG image into something much closer to a finished result.
There are generally two types of LUTs:
-
Conversion LUTs – designed to convert LOG footage into a standard Rec.709 image.
-
Creative LUTs – used to apply a particular cinematic style or mood.
Many professional editors begin every project with a LUT before making smaller manual adjustments afterwards. This speeds up the editing process dramatically while maintaining a consistent look across an entire project.

Step 1: Install LUTs in DaVinci Resolve
Installing LUTs into DaVinci Resolve only takes a minute.
Follow these steps:
-
Open DaVinci Resolve.
-
Click the Settings (Gear) icon in the bottom-right corner.
-
Open the Colour Management tab.
-
Select Open LUT Folder.
-
Your computer's LUT directory will appear.
-
Drag and drop your LUT pack into this folder.
-
Return to DaVinci Resolve.
-
Click Update Lists.
Your LUTs will now appear inside the Colour page, ready to use in any project.
The process requires no additional software or plugins, making LUTs one of the easiest ways to improve LOG footage.
Step 2: Apply Your LUT
Once your footage has been imported, move across to the Colour page.
Now:
-
Create a new Serial Node.
-
Right-click on the node.
-
Choose LUTs.
-
Select the cinematic LUT you'd like to apply.
Instantly you'll notice a huge difference.
The image regains:
-
Natural-looking contrast
-
Richer colours
-
Better saturation
-
Improved tonal balance
-
A much more finished appearance
Rather than spending 20 minutes building a grade from scratch, you're already much closer to a professional result within seconds.
This is exactly why LUTs have become such an important part of many professional editing workflows.
Step 3: Fine-Tune Your Colour Grade
Although LUTs provide an excellent starting point, every shot is different.
Lighting conditions, camera settings and white balance will all vary, meaning you'll almost always benefit from making a few small adjustments after applying your LUT.
Adjust Exposure
If your image looks slightly dark or bright, make subtle exposure adjustments until the scene feels balanced.
Avoid pushing exposure too aggressively. Small changes generally produce more natural-looking results.
Recover Highlights
Bright skies, windows and reflective surfaces can sometimes become overpowering after applying a LUT.
Reducing the highlights slightly helps recover detail while maintaining a softer, more cinematic image.

Lift the Shadows
Deep shadows often add drama, but if they're crushed too heavily you'll lose important detail.
Gently lifting the shadow areas helps maintain texture while keeping good contrast throughout the frame.
Correct White Balance
One of the biggest giveaways of amateur footage is incorrect white balance.
If your footage feels too warm or too cool, adjust the temperature and tint until whites appear neutral and skin tones look natural.
Even footage that wasn't perfectly white balanced during filming can often be rescued with a few simple adjustments inside DaVinci Resolve.
Keep Your Grade Natural
One common mistake beginners make is trying to push colours too far.
Professional colour grading isn't always about dramatic looks.
Often it's the subtle improvements that make the biggest difference.
A balanced image with controlled contrast, realistic skin tones and pleasing colours will almost always look more cinematic than one that's been heavily processed.

Compare Before and After
The transformation can be remarkable.
Your original LOG footage may look:
-
Grey
-
Flat
-
Low contrast
-
Low saturation
After colour grading you'll typically achieve:
-
Rich, vibrant colours
-
Better contrast
-
Controlled highlights
-
Deeper shadows
-
Greater image depth
-
A polished cinematic appearance
The footage hasn't changed—only the way you've processed it.
That's the real power of shooting in LOG.
Choosing the Right LUT for Your Project
Different projects call for different visual styles.
For example:
-
Wedding films often benefit from warm, soft colours with natural skin tones.
-
Travel videos usually suit vibrant colours with extra punch and contrast.
-
Commercial work often requires clean, modern colour palettes.
-
Vintage edits can make use of faded colours, softer contrast and film-inspired looks.
-
Cinematic productions may lean towards cooler shadows, controlled highlights and rich mid-tones.
Having a collection of different LUTs available allows you to quickly establish the visual identity of each project before making your own finishing adjustments.

Speed Up Your DaVinci Resolve Workflow
Colour grading is only one part of editing.
If you're spending hours working inside DaVinci Resolve, learning keyboard shortcuts can dramatically improve your efficiency.
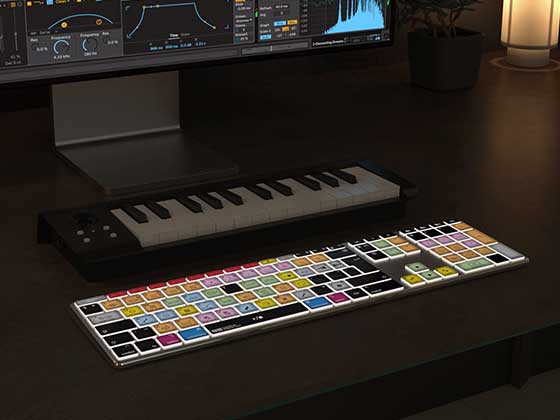
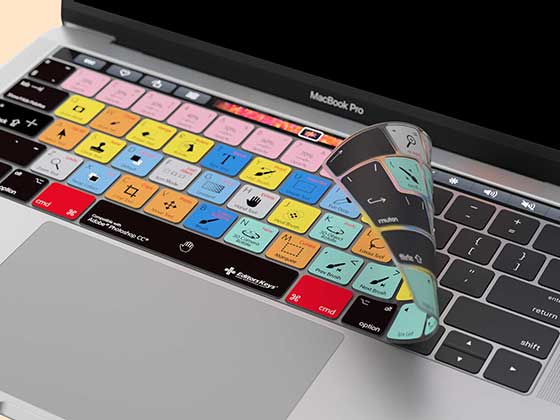
The Editors Keys AB10 Core (wired) and AB10 Air (wireless Bluetooth) backlit keyboards have been designed specifically for DaVinci Resolve users, with over 150 colour-coded shortcuts printed directly onto the keys. Instead of constantly searching through menus or trying to memorise shortcuts, every important command is always visible, helping you edit faster and more confidently.

Both keyboards feature adjustable backlighting, making them particularly useful during long editing sessions or when working in dimly lit studios. The AB10 Air also supports pairing with up to three devices, allowing you to switch seamlessly between a Mac, PC or compatible tablet, while the AB10 Core provides the reliability of a permanent USB-C wired connection.
Whether you're trimming footage, colour grading, adding effects or navigating your timeline, having the shortcuts in front of you can significantly speed up your workflow and reduce interruptions to your creative process.
Professional LUTs Designed for DaVinci Resolve
If you're looking for an easy way to improve your colour grading workflow, the Editors Keys LUT Packs have been created specifically for DaVinci Resolve users.
With a range of cinematic, vintage, natural and professional looks available, they're designed to give you an excellent starting point for almost any style of project. Once applied, you can continue refining the image to perfectly match your own creative vision.
Using high-quality LUTs can save valuable editing time while helping you maintain a consistent look across an entire production.
Final Thoughts
LOG footage can look intimidating at first, especially if you're new to DaVinci Resolve. However, that flat, grey image actually contains an incredible amount of information that's waiting to be brought to life.
By installing a quality LUT, applying it correctly and making a handful of subtle adjustments to exposure, highlights, shadows and white balance, you can transform dull-looking footage into something that feels polished, cinematic and professional.
As you gain more experience, you'll begin developing your own colour grading style, but this simple workflow provides an excellent foundation that works for everything from YouTube videos and travel films to client work and commercial productions.
If you're looking to edit faster, explore the Editors Keys DaVinci Resolve Shortcut Keyboards, and if you'd like to simplify your grading workflow, take a look at the Editors Keys LUT Packs—both designed to help you spend less time searching through menus and more time creating stunning-looking videos.