
How to Quantise MIDI Like a Professional in Cubase 15
If you record MIDI instruments in Cubase 15, there is a good chance that you will eventually encounter a performance that sounds great but is just slightly out of time. Perhaps your kick drum lands a little late, your bassline doesn't quite lock with the drums, or a piano part has notes arriving at slightly different positions than you intended.
This is where MIDI quantisation becomes one of the most useful tools in your Cubase workflow.
Quantisation allows you to move MIDI notes towards a musical timing grid, helping you correct timing inconsistencies, tighten performances and create more precise rhythmic patterns. However, professional quantisation is about much more than simply selecting every MIDI note and pressing a button. Used too aggressively, quantisation can remove the natural timing variations that make a performance sound human. Used intelligently, it can give you the best of both worlds: the precision of programmed MIDI with the feel of a real performance.
Cubase 15 includes a comprehensive set of quantisation tools covering MIDI note starts, note lengths, note ends, swing, tuplets, grooves, controller data and audio. Its Quantise Panel gives you detailed control over how MIDI and audio are moved towards a musical grid or groove.
In this guide, we'll explain how to quantise MIDI in Cubase 15, how Cubase quantisation works, how to use the Quantise Panel, how to quantise individual notes, how to retain human feel, how to use groove quantisation and how to quantise recorded audio using AudioWarp.
We'll also look at how professional producers use quantisation in real-world music production and how an Editors Keys shortcut keyboard or keyboard cover can help you speed up your Cubase workflow.

What Is MIDI Quantisation?
MIDI quantisation is the process of adjusting the timing of MIDI events so that they move towards positions on a predefined musical grid.
When you play a MIDI keyboard, drum pad or other controller, your notes won't necessarily land exactly on the beat. Even extremely experienced musicians naturally produce tiny variations in timing.
For example, you might intend to play:
1 – 2 – 3 – 4
but actually play something closer to:
1 – slightly late – slightly early – slightly late
These differences might only be a few milliseconds, but they can make a significant difference to how tight a production feels.
Cubase can analyse the positions of those MIDI notes and move them towards the nearest relevant position on the selected quantisation grid.
The important word here is towards.
Professional quantisation doesn't necessarily mean moving every note exactly onto the grid. Cubase provides controls that allow you to determine how strongly the timing should be corrected, giving you the ability to retain some of the original performance.
What Is Quantisation Used For in Professional Music Production?
Quantisation is used throughout modern music production, from electronic music and hip-hop to pop, rock, film scoring and commercial music.
One of its most obvious applications is correcting timing mistakes.
If a drummer playing an electronic kit hits the snare slightly late, you can move that MIDI note towards the correct position. If a bass player records a MIDI bassline that doesn't quite lock with the kick, you can tighten the relationship between the two.
However, professional producers also use quantisation creatively.
You can use it to introduce swing, impose a particular groove, make an arrangement deliberately rigid or make several different performances feel as though they were played with the same rhythmic character.
This is why quantisation is better thought of as a musical editing tool rather than simply a mistake-correction function.

Before You Quantise: Understand Your Musical Grid
The first thing you need to consider before quantising MIDI is what rhythmic grid the performance is actually based around.
Cubase's Quantise Preset determines the basic rhythmic resolution used when quantising. Cubase 15 provides a range of musical grid options, while the Quantise Panel gives you more advanced control over how that grid is applied.
Common settings include:
1/4 – quarter notes
1/8 – eighth notes
1/16 – sixteenth notes
1/32 – thirty-second notes
There are also triplet and other tuplet-based options.
If you've recorded a simple bassline consisting primarily of quarter notes, a 1/4 grid might make sense.
If you've programmed a typical electronic drum pattern containing sixteenth-note hi-hats, a 1/16 grid is likely to be more appropriate.
The important thing is not to automatically choose the smallest possible grid.
A 1/32 grid may sound impressive because it offers greater precision, but if your performance is fundamentally based around eighth or sixteenth notes, it can cause Cubase to make timing decisions you don't actually want.
Choose the grid according to the music, not simply according to the amount of precision available.
How to Quantise MIDI in Cubase 15
The basic process is straightforward.
Step 1: Record or Import Your MIDI
Start with a MIDI part containing the performance you want to edit.
This could be:
-
A MIDI keyboard performance
-
An electronic drum recording
-
A MIDI bassline
-
A piano performance
-
A synthesiser part
-
A MIDI guitar performance
-
A programmed drum pattern
-
MIDI imported from another project
Once the MIDI is in your Cubase project, you can work with it either from the Project window or by opening it in the Key Editor.
Step 2: Select the MIDI Part
In the Project window, select the MIDI part you want to quantise.
If you want to work on individual notes rather than the entire part, open the MIDI event in the Key Editor.
This is an important distinction.
You don't necessarily need to quantise every note in a performance.
For example, you might find that the kick drum is consistently late while the hi-hats already feel great. In that situation, selecting only the kick notes gives you much more control.
The Key Editor is therefore particularly useful for detailed MIDI quantisation because you can visually see exactly where individual notes sit relative to the musical grid.
Step 3: Choose Your Quantise Preset
Next, choose the appropriate Quantise Preset.
If your performance is based around sixteenth notes, select a 1/16 quantisation value.
If you're working with eighth notes, choose 1/8.
If you're working with triplets, choose an appropriate triplet setting.
Before applying the quantisation, take a look at where your MIDI notes sit relative to the grid.
This can often tell you whether the problem is actually as significant as you initially thought.
Remember that a note doesn't necessarily need to sit exactly on a line to sound good.
Step 4: Apply Quantise
Once you've selected your MIDI notes or MIDI part and chosen your quantisation grid, you can apply the quantisation command.
Cubase provides the Quantise command for this purpose, and the standard Cubase key command is Q.
So a basic workflow can be as simple as:
Select MIDI → choose grid → press Q
Cubase moves the selected MIDI events towards the relevant positions on the selected quantisation grid.
This is one of the reasons learning Cubase keyboard shortcuts can make such a dramatic difference to your workflow. Instead of constantly navigating menus, you can make timing adjustments almost instantly.
The Cubase 15 Quantise Panel
If you want much more control than basic quantisation provides, open the Quantise Panel.
The Quantise Panel is where Cubase becomes particularly powerful for professional MIDI editing.
It allows you to define how quantisation behaves and provides options for working with musical grids and grooves. Cubase 15's documentation includes dedicated controls for musical-grid quantisation, groove quantisation, multiple audio tracks and AudioWarp quantisation.
This means that you don't have to think of quantisation as an on/off switch.
Instead, you can control:
-
The quantisation grid
-
Quantise strength
-
Swing
-
Tuplets
-
Catch range
-
Groove quantisation
-
MIDI controller movement
-
MIDI event lengths
-
MIDI event ends
That level of control is what allows you to use quantisation professionally rather than simply applying a blanket correction.
Quantise Strength: Why 100% Isn't Always Best
One of the biggest mistakes beginners make with MIDI quantisation is assuming that 100% is always better. It isn't.
If you quantise every note to 100%, Cubase will make the performance extremely precise. That's useful for some types of music, but it can also make a human performance sound mechanical.

Cubase provides Soft Quantise, which allows you to apply quantisation without forcing every event completely onto the grid. The Quantise Strength value determines how strongly the material is moved towards the grid.
Imagine that a note is 20 milliseconds late. With aggressive quantisation, Cubase might move it all the way to the grid. With softer quantisation, it can move part of the way. The result is tighter timing while retaining some of the original performance.
How Much Should You Quantise?
There is no universal answer.
However, a useful starting point for a human MIDI performance might be somewhere around 50–70%.
Listen.
If the performance is still too loose, increase the amount.
If it starts sounding unnatural, reduce it.
You can also use different amounts of quantisation on different instruments.
For example, you might heavily quantise a kick drum while barely touching the hi-hats.
A useful starting point could be:
Kick: 90–100%
Snare: 80–100%
Bass: 70–90%
Hi-hats: 50–80%
Percussion: 40–70%
These aren't rules. They're simply starting points.
The correct setting depends entirely on the genre, performance and desired sound.
How to Quantise MIDI Note Starts in Cubase 15
The most common type of MIDI quantisation concerns the start position of each note.
For example, imagine you've recorded a bassline where several notes are slightly late.
You can select those MIDI notes in the Key Editor, choose your desired Quantise Preset and apply Quantise.
Cubase moves the note starts towards the relevant grid positions while retaining their existing lengths.
This is particularly useful for:
-
Kick drums
-
Snare drums
-
Basslines
-
Piano
-
Synthesiser melodies
-
Arpeggios
-
Percussion
-
MIDI guitar
For most MIDI editing situations, this is the first type of quantisation you'll use.
How to Quantise MIDI Note Lengths
Timing isn't only about when a note starts.
How long a note lasts can be equally important.
Imagine a synth sequence where every note should be exactly one sixteenth note long.
The starts might be perfectly aligned, but some notes could be slightly longer or shorter than others.
Cubase allows you to quantise MIDI event lengths separately.
This is particularly useful for:
-
Staccato basslines
-
Synth sequences
-
Rhythmic piano
-
Arpeggios
-
Short percussion sounds
-
Repetitive electronic patterns
It gives you control over the rhythmic shape of the performance without necessarily changing where the notes begin.
How to Quantise MIDI Event Ends
Cubase also allows you to quantise the ends of MIDI events.
This is subtly different from changing the overall note length.
If you have a MIDI performance where the beginnings of notes are already correct but the ends are inconsistent, quantising the event ends can help create a more uniform rhythmic pattern.
This can be especially useful for programmed synths and tightly rhythmic MIDI parts where note lengths contribute heavily to the groove.

Quantise Swing in Cubase 15
Not all music is supposed to feel perfectly straight.
Swing is one of the most obvious examples.
Cubase's quantisation system allows you to introduce swing by changing the position of alternating notes within a straight rhythmic grid.
Swing can be particularly useful for:
-
Funk
-
Jazz
-
Soul
-
Hip-hop
-
R&B
-
House
-
Shuffle rhythms
Rather than simply correcting timing, you're deliberately changing the rhythmic relationship between notes.
This can transform the character of a MIDI performance.
Quantise Tuplets and Triplets
If you're working with triplets, standard straight quantisation isn't necessarily appropriate.
Cubase's quantisation system supports tuplets, allowing you to work with rhythmic divisions that don't fit into a standard straight grid.
This is useful for:
-
Blues
-
Jazz
-
Shuffle
-
Triplet-based piano
-
Guitar phrases
-
Experimental rhythms
-
Complex electronic patterns
The key is to make the quantisation grid match the rhythmic language of the performance.
Groove Quantisation: Make MIDI Feel More Musical
One of the most interesting applications of Cubase's quantisation tools is groove quantisation.
Instead of forcing MIDI onto a mathematically straight grid, you can use a groove as the rhythmic reference.
This can be incredibly powerful when you want multiple instruments to share the same rhythmic character.
For example, imagine you've recorded a percussion performance that has a fantastic natural groove.
Rather than quantising everything to a perfectly straight grid, you can use that performance as a rhythmic reference for other MIDI parts.
Your bass, synths and drums can then share aspects of the same timing feel.
This can help a production sound much more cohesive.
Why You Shouldn't Quantise Every MIDI Track
This is probably the most important lesson when learning how to quantise MIDI professionally.
Don't quantise everything simply because you can.
A performance can be technically imperfect while still sounding musically excellent. A pianist might deliberately play one chord slightly ahead of the beat, a drummer might sit slightly behind the beat, a bassist might push certain notes forward.
These tiny timing variations can contribute enormously to groove and emotion. If you completely remove them, the performance can lose its personality. Instead, ask yourself:
What actually needs correcting?
If only a few notes are problematic, fix those notes. If the entire performance is loose, use a gentler overall quantisation. If the timing is good but the groove is inconsistent, consider groove quantisation. The best MIDI editing is often the editing the listener never notices.
How to Quantise Drums in Cubase 15
Drums are one of the most common reasons producers reach for quantisation.
Let's say you've recorded an electronic drum performance.
The kick is slightly inconsistent, the snare is mostly good and the hi-hats have a nice human feel.
A beginner might select everything and press Q.
A more experienced producer might separate the problem areas.
Start with the kick.
Select the kick notes and quantise them relatively strongly.
Then examine the snare.
If it already sounds good, don't change it unnecessarily.
Finally, look at the hi-hats.
If they provide a useful human feel, you may want to leave them completely untouched or apply only a small amount of quantisation.
The result is a drum performance that is tight where it needs to be while still retaining movement.

How to Quantise Bass MIDI
The relationship between the kick and bass is one of the most important rhythmic relationships in a production.
If your kick is precisely on the beat but your bassline is consistently late, the low end can feel loose.
Quantising the bass can help the two instruments lock together.
However, once again, 100% quantisation isn't automatically the answer.
A bassline with a little natural movement can sound much more musical than one that has been completely flattened onto the grid.
Try tightening the important notes while leaving some variation elsewhere.
How to Quantise Piano MIDI
Piano is another instrument where over-quantisation can become obvious.
A human pianist rarely strikes every note of every chord at precisely the same moment.
Those microscopic differences contribute to expression.
If you completely quantise a piano performance, it can begin to sound like a programmed MIDI sequence rather than something performed by a musician.
For expressive piano, try using a lower Quantise Strength.
You can also selectively quantise the most problematic notes rather than processing the entire performance.
The goal should be to correct obvious timing problems without destroying the performance's natural character.
Quantisation and Human Feel
One of the most useful ways to think about quantisation is this:
Quantisation should correct problems, not eliminate humanity.
A professional producer isn't necessarily trying to achieve mathematical perfection.
They're trying to achieve the right feel.
Sometimes that means 100% quantisation.
Sometimes it means 60%.
Sometimes it means no quantisation at all.
And sometimes it means deliberately quantising something in a way that creates a new rhythmic feel.
How to Quantise Audio in Cubase 15
Cubase 15 isn't limited to MIDI quantisation.
You can also quantise audio.
However, audio quantisation works differently because recorded audio isn't made up of MIDI notes.
Cubase provides several audio quantisation functions, including AudioWarp quantisation. The Cubase 15 documentation specifically covers audio event starts, audio event lengths, multiple audio tracks and AudioWarp quantisation.
This means you can work on the timing of recorded performances such as:
-
Live drums
-
Guitar
-
Bass
-
Vocals
-
Percussion
-
Recorded loops
-
Other rhythmic performances
Quantising Audio Event Starts
The simplest approach is to quantise the audio event itself.
First, select the audio event or audio part you want to edit.
Choose your desired Quantise Preset.
Then apply the Quantise command.
Cubase can move audio event starts towards the selected grid positions.
This works particularly well when your audio has already been split into individual events.
For example, if you've manually sliced a drum recording into individual hits, you can move those events towards the desired rhythmic positions.
AudioWarp Quantise in Cubase 15
AudioWarp is more sophisticated because it can change the timing within the audio rather than simply moving the entire event.
Cubase can use warp markers to identify relevant timing positions and then use time-stretching to adjust the audio between those positions.
This is particularly powerful for recorded drums.
Imagine a live drummer playing a four-bar groove.
The first kick might be perfect.
The second kick might be slightly late.
The snare might be slightly early.
The hi-hat might be somewhere in between.
Simply moving the whole audio event wouldn't fix those individual timing differences.
AudioWarp allows Cubase to manipulate the timing within the recording.
This gives you a similar type of timing control over audio that MIDI quantisation provides over MIDI.
MIDI Quantisation vs Audio Quantisation
It's important to understand the fundamental difference.
With MIDI, Cubase is dealing with instructions.
A MIDI note contains information such as:
Pitch
Start time
Length
Velocity
Controller information
Cubase can therefore move the note or change its length without altering the underlying audio because the instrument hasn't actually been recorded yet.
With audio, the sound has already been recorded.
Cubase therefore has to manipulate the recorded waveform using event editing and time-stretching techniques.
This is why AudioWarp is such an important part of the Cubase workflow when you're working with recorded performances.
A Professional Cubase 15 Quantisation Workflow
If you want a reliable workflow for quantising MIDI, try the following process.
1. Listen to the original performance
Before touching anything, listen to the performance from beginning to end.
Don't edit based solely on what you see.
2. Identify the actual problem
Ask yourself whether the timing is genuinely wrong or whether you're simply reacting to notes that aren't visually aligned with the grid.
3. Choose the correct grid
Determine whether the performance is based around quarter notes, eighth notes, sixteenth notes, triplets or another rhythmic subdivision.
4. Select only the material that needs editing
Don't automatically select the entire track.
5. Apply gentle quantisation first
Try Soft Quantise or a lower Quantise Strength.
6. Listen again
Always listen to the result in the context of the entire production.
7. Increase the strength if necessary
If the timing is still too loose, gradually increase the correction.
8. Check the groove
Make sure the relationship between your drums, bass and other rhythmic instruments still feels good.
9. Consider swing or groove quantisation
If straight quantisation isn't giving you the feel you want, a groove may be more appropriate.
10. Stop when it sounds right
Don't continue editing simply because some notes aren't visually perfect.
Quantise With Your Ears, Not Your Eyes
This is worth emphasising because modern DAWs make it incredibly easy to become obsessed with visual perfection.
You can zoom into a MIDI part until individual notes look enormous.
You can see exactly which notes are early and which are late.
But music isn't judged by how neatly the MIDI notes line up on your computer screen.
It's judged by how it sounds.
A note that is technically 15 milliseconds late might sound fantastic.
A note that is mathematically perfect might sound completely lifeless.
Use the grid as a guide rather than treating it as an absolute law.
Don't Forget MIDI Velocity
Quantisation primarily deals with timing.
It doesn't automatically make a MIDI performance expressive.
If every note has exactly the same velocity, your performance can still sound mechanical even if the timing is excellent.
For truly professional MIDI programming, you should consider several different dimensions of the performance:
Timing
Velocity
Note length
Note placement
Expression
Pitch bend
Modulation
Quantisation is only one part of the process.
Keep MIDI Controller Data in Sync
Cubase's Quantise Panel also provides options for moving MIDI controller information along with quantised notes.
This can be important when your performance contains expressive information such as pitch bend or other MIDI controller data.
Imagine a synthesiser melody with pitch bend occurring immediately after particular notes.
If you move the notes but leave the expressive controller data in its original position, the performance can become disconnected.
Keeping relevant controller information aligned with the MIDI notes can help preserve the original musical expression.
Should You Quantise While Recording?
Cubase can also be configured to quantise MIDI during recording.
This can be useful for music that deliberately requires very rigid timing.
However, there is a strong argument for recording your performance naturally and editing it afterwards.
Why?
Because you retain the original performance.
You can always make it tighter.
You can always reduce the timing variations.
But if you completely remove those variations during recording, you have fewer options later.
For many producers, a good philosophy is:
Record the performance. Edit the performance. Don't destroy the performance.

The Difference Between Amateur and Professional Quantisation
The amateur approach often looks like this:
Record → Select All → Q → Done
The professional approach is more likely to be:
Record → Listen → Identify timing problems → Choose an appropriate grid → Select relevant notes → Apply appropriate Quantise Strength → Listen in context → Adjust → Preserve the groove
The difference isn't necessarily the software.
It's the decision-making.
Cubase 15 gives you the tools.
Your job as the producer is to decide how much correction the music actually needs.
Speed Up Cubase 15 With Editors Keys Shortcut Keyboards
Once you start working seriously with Cubase, you'll quickly realise just how many commands you use repeatedly. Quantising is a perfect example.
Instead of navigating through menus every time you want to tighten a MIDI performance, Cubase's Q shortcut lets you apply the Quantise command quickly.
And that's only one shortcut.
During a typical production session you might constantly be:
-
Opening the Key Editor
-
Zooming in and out
-
Splitting MIDI parts
-
Moving between tracks
-
Starting and stopping playback
-
Undoing edits
-
Creating markers
-
Editing automation
-
Opening windows
-
Copying and pasting MIDI
-
Quantising performances
-
Navigating around your arrangement
When you're performing these actions hundreds or thousands of times, keyboard shortcuts can make a substantial difference to your workflow.

That's exactly where Editors Keys shortcut keyboards come in.
Explore Editors Keys Shortcut Keyboards
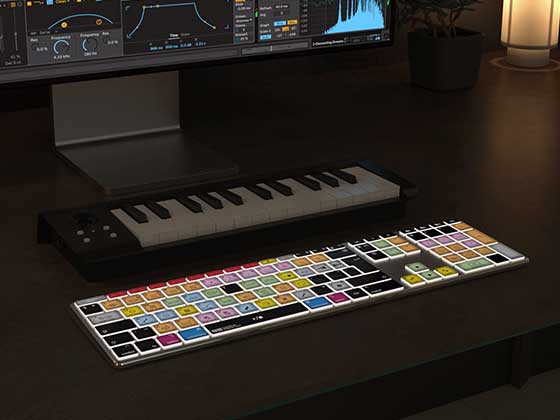
Editors Keys produces dedicated shortcut keyboards and keyboard covers for creative software, including Steinberg Cubase. The shortcuts are printed directly onto the keys, providing an immediate visual reference while you work. Rather than constantly referring to a shortcut list, you can look directly at your keyboard and see the commands associated with the keys.
Learn Cubase Shortcuts While You Work
One of the biggest advantages of having shortcuts printed directly onto the keyboard is that it can help you memorise them naturally. You don't necessarily need to sit down and memorise a giant list of Cubase keyboard shortcuts. Instead, you can gradually incorporate them into your workflow.
You might initially look down to find the command you need, but after using it repeatedly, you begin remembering the key combination. Eventually, you stop looking at the keyboard altogether!

This creates a natural progression:
See the shortcut → use the shortcut → remember the shortcut → use it automatically
That can make a significant difference to your editing speed. Editors Keys' current range includes a new Cubase-compatible backlit keyboard, with wired and wireless options available, alongside dedicated keyboard covers.
Editors Keys Keyboard Covers for Cubase
If you already have a Mac keyboard that you like, you don't necessarily need to replace it.
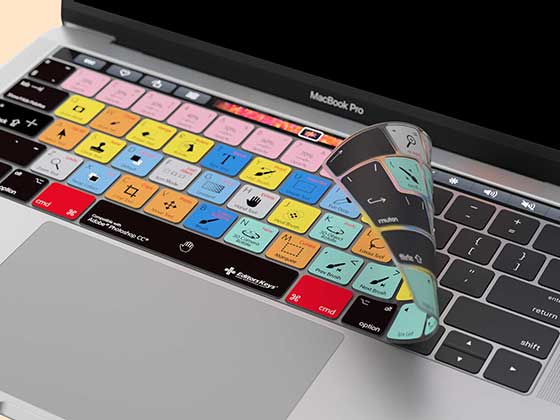
Editors Keys also produces keyboard covers designed to place software shortcuts directly over your existing keyboard.
Browse Editors Keys Keyboard Covers
These covers combine shortcut references with protection for your keyboard, making them particularly useful for producers who work on a MacBook or iMac.
Instead of having a separate shortcut cheat sheet sitting beside your computer, the information is right where you need it: on the keyboard itself.
For someone learning Cubase, this can be especially useful because you can gradually become familiar with the software's commands through everyday use.
Why Keyboard Shortcuts Matter for Music Producers
Music production can involve thousands of tiny editing decisions.
The mouse is incredibly useful, but constantly moving between the mouse, menus and different windows can interrupt your creative flow.
Keyboard shortcuts allow you to keep your hands closer to the main controls and execute common commands much more quickly.
This becomes particularly important when you're performing repetitive editing tasks.
Quantisation is a perfect example.
If you're editing a drum performance and repeatedly selecting groups of MIDI notes before applying Quantise, being able to trigger the command instantly can keep you focused on the groove rather than the mechanics of the software.
Shop Editors Keys Audio Editing Keyboards
The latest Editors Keys range is designed around this principle: put the commands where your hands already are and make the software easier to navigate.
Cubase 15 Quantisation: The Professional Approach
Cubase 15 gives you far more control over timing than simply snapping notes to a grid.
You can quantise MIDI note starts, adjust note lengths and ends, introduce swing, work with tuplets, use groove quantisation and control the strength of your edits.
You can also work with recorded audio using Cubase's audio quantisation and AudioWarp tools. Steinberg's official Cubase 15 documentation includes dedicated quantisation workflows for both MIDI and audio.
The key is to use these tools musically.
If you're producing an electronic track that needs extreme precision, 100% quantisation may be exactly what you want.
If you're editing a human piano performance, a lighter touch might be much better.
If you're working with live drums, perhaps only the kick and snare need significant correction.
If you have a fantastic groove recorded elsewhere, groove quantisation might be more appropriate than a straight grid.
There is no single "correct" quantisation setting.
Final Thoughts: Make MIDI Tighter Without Killing the Groove
Learning how to quantise MIDI in Cubase 15 is one of those skills that can fundamentally change the way you produce music.
At a basic level, quantisation fixes timing problems.
At a professional level, it becomes something much more interesting: a way of controlling the relationship between precision, groove and human performance.
Don't be afraid to quantise heavily when the music calls for it. But equally, don't assume that every MIDI note needs to sit perfectly on the grid.
- Listen to the original performance.
- Understand the rhythmic problem.
- Choose an appropriate grid.
- Apply the right amount of correction.
- Then listen again.
If the track feels tighter without losing its character, you've probably found the right balance.
And once you're comfortable with Cubase's quantisation tools, start learning the keyboard shortcuts you use most frequently. The less time you spend hunting through menus, the more time you can spend making musical decisions.
With an Editors Keys shortcut keyboard or keyboard cover, those Cubase commands are mapped directly onto the keys, giving you a constant visual reference while you work and helping you build shortcut muscle memory over time.
Discover the Editors Keys Cubase shortcut keyboard range
Quantise the notes that need it. Keep the feel that doesn't. And above all, trust your ears.