

If you have ever wondered how to Auto-Tune vocals in Logic Pro, the good news is that you do not necessarily need an expensive third-party plug-in to get started. Logic Pro 12.3 includes its own Pitch Correction plug-in, which can be used for everything from subtle vocal tuning and fixing individual notes to creating the unmistakable, heavily processed Auto-Tune sound heard across modern pop, hip-hop, R&B and electronic music.
The important thing to understand is that Auto-Tune is not simply a matter of inserting a plug-in and turning a knob. The quality of the result depends heavily on the original vocal performance, the key and scale of the song, the speed of the correction and how aggressively you allow the processor to pull the singer towards the target notes. Used carefully, pitch correction can make a good performance sound polished and natural. Push the settings much harder and you can deliberately create the robotic, almost synthesised vocal effect that has become a defining sound of modern music.
This guide explains how to Auto-Tune vocals in Logic Pro 12.3, how Logic's Pitch Correction plug-in works, what the Response and Tolerance controls actually do, which settings to try for natural and extreme sounds, how Logic Pro's Pitch Shifter differs from pitch correction, and how to build a professional vocal-tuning workflow from the ground up.

What Is Auto-Tune?
"Auto-Tune" is often used as a generic term for automatic pitch correction, although Auto-Tune itself is a specific family of products developed by Antares. The basic idea behind pitch correction is relatively straightforward: software analyses the pitch of an incoming vocal and moves notes towards a defined target pitch.
A singer might perform a note that is slightly sharp or flat. Rather than recording the entire part again, pitch-correction software can identify the intended note and adjust the vocal towards it. Logic Pro's Pitch Correction effect does this by analysing the incoming audio and correcting it according to a chosen pitch scale. Apple describes the process as adjusting the playback speed of the audio so that the input matches the desired note while retaining natural elements such as breath sounds. (Apple Support)
The crucial point is that pitch correction does not necessarily mean an obvious robotic vocal. In fact, many professionally produced vocals contain pitch correction that you would never consciously notice. The processor can simply remove small imperfections while leaving the character of the performance intact.
The famous "Auto-Tune sound" is produced when the correction is made extremely fast and aggressively. Instead of allowing a singer to naturally glide from one note to another, the processor forces the voice towards the target pitch almost immediately. That creates the distinctive hard, stepped transitions associated with the effect.
Auto-Tune vs Pitch Correction: What's the Difference?
There is an important distinction between correcting a vocal and using pitch correction as a creative effect.
Imagine a singer performs a verse beautifully but several notes are slightly flat. You might want to correct those imperfections without changing the personality of the performance. In that situation, you would generally use a relatively gentle Pitch Correction setting.
Now imagine you are producing a modern trap, pop, hip-hop or electronic vocal and specifically want the pitch-corrected effect to be obvious. In that situation, you can deliberately make the correction much faster and more aggressive.
Logic Pro's Pitch Correction effect is therefore capable of both approaches. Apple specifically describes it as suitable for subtle corrections as well as creative effects, including heavily processed vocal sounds. (Apple Support)
How to Auto-Tune a Vocal in Logic Pro 12.3
Before adding any plug-in, make sure you know the key of your song. This is one of the most important parts of the entire process.
If your song is in C major, for example, Logic needs to know that C major is the musical reference against which the vocal should be corrected. If you accidentally select C minor, A minor or another scale, Logic may attempt to pull perfectly good vocal notes towards completely inappropriate pitches.
If you do not know the key, use Logic Pro's musical analysis tools, a software instrument playing the chord progression, or another reliable method to establish the tonal centre. You should always check the result by ear rather than assuming that a pitch-detection tool has necessarily identified the correct key.
Step 1: Prepare your vocal recording
Start with a clean, reasonably well-recorded vocal. Auto-Tune is not a replacement for good recording technique, and pitch correction works considerably better when the original performance is reasonably close to the intended notes.
Ideally, record the vocal without excessive effects already printed into the audio. A clean recording gives Logic a much clearer signal to analyse. Excessive reverb, delay, distortion or background noise can make pitch detection more difficult.
It is also worth editing the vocal before you begin serious tuning. Remove obvious unwanted noises, choose the best takes and use comping where necessary. If a singer has completely missed a note, pitch correction may be able to produce something interesting, but there is a limit to what automatic processing can realistically repair.
Logic's Pitch Correction is primarily designed around monophonic, pitched material. It is therefore particularly useful for lead vocals, bass lines and other single-note performances. Polyphonic recordings such as chords or choirs are not suitable for conventional automatic single-note pitch correction. (Apple Support)

Step 2: Add the Pitch Correction plug-in
Select your vocal track and open an Audio Effect insert in the channel strip.
Navigate to:
Audio Effects → Pitch → Pitch Correction
Apple's Logic Pro documentation confirms that Pitch Correction is added through the Pitch section of the channel-strip Audio Effect plug-in menu. (Apple Support)
Once the plug-in opens, you will see the main Pitch Correction interface.
Do not immediately start moving the Response control. There are more important things to establish first.
Step 3: Select the correct key and scale
The first major setting is the Root Note.
Set this to the root of your song. If the song is in G major, choose G. If it is in E minor, choose E.
Next, select the appropriate Scale/Chord.
For a song in G major, you would normally choose Major and set the root to G. For E minor, select Minor and set the root to E.
Logic's Pitch Correction works using a pitch quantisation grid. Rather than simply asking "what is the nearest note?", it can restrict the possible correction targets to the notes that belong to the selected scale. (Apple Support)
This is extremely important because a chromatic scale gives the processor considerably more possible destinations. A correctly selected musical scale gives it a much more useful set of instructions.
Step 4: Leave Neural Pitch Detection enabled
Logic Pro 12.3 includes Neural Pitch Detection, which is designed to improve the way the software identifies the pitch range of the incoming audio.
For most vocal recordings, you can leave this enabled. Apple recommends generally leaving Neural Pitch Detection on. If it is disabled, Logic allows you to manually select the pitch range instead. The Normal range is suitable for most material, while Low is intended for material containing extremely low frequencies where pitch detection could otherwise become inaccurate. (Apple Support)
For a conventional male or female vocal, there is usually no reason for a beginner to overthink this setting. Start with Neural Pitch Detection enabled and only investigate the manual range settings if Logic appears to be tracking the vocal incorrectly.
Understanding the Pitch Correction Plugin
This is where Logic Pro's Pitch Correction becomes considerably more interesting.
There are several controls within the plug-in that determine what notes are considered correct and how aggressively the vocal is moved towards them.
Root Note
The Root Note establishes the tonal centre of the correction.
If your song is in A minor, choose A. If your song is in D major, choose D.
Getting this wrong can produce strange results because the processor is effectively being told that the vocal belongs to a different musical environment.
Scale/Chord
The Scale/Chord setting determines the collection of pitches Logic uses as correction targets.
The default is chromatic, which contains all twelve notes of the Western chromatic scale. You can instead choose major, minor and other available scales or define your own scale.
The User Scale is particularly useful when your song does not fit neatly into a conventional major or minor scale. Logic allows you to edit the notes available to the correction process using the keyboard displayed inside the plug-in. (Apple Support)
This can be extremely powerful for producers working with unusual melodies, modal music or chord progressions that contain notes outside the conventional scale.
Response
Response is one of the most important controls when trying to achieve a particular Auto-Tune sound.
It determines how quickly the vocal moves towards its corrected destination pitch. Apple explains that a response setting which is too fast can turn natural vocal slides and portamento into stepped, semitone-like movements, while a response that is too slow may not correct the pitch quickly enough. (Apple Support)
Think of Response as controlling how quickly the processor reacts.
A slower response allows the singer's natural movement to remain audible. If a singer approaches a note from below, the vocal can retain some of that natural glide before settling on the target pitch.
A faster response effectively tells Logic, "Get to the correct note immediately."
This is the fundamental ingredient of the classic hard Auto-Tune sound.
For a natural vocal, try a moderate response and listen carefully to the transitions between notes. You want the correction to fix the pitch without making every note sound unnaturally locked.
For a strong modern Auto-Tune effect, dramatically reduce the response time. The exact value will depend on the singer and the material, so it is better to listen for the desired behaviour than to treat one number as universally correct.
A fast response is particularly noticeable on sustained notes, slides and transitions between different pitches. If you want that unmistakable electronic vocal sound, this is one of the first controls you should experiment with.

Tolerance
Tolerance determines how much pitch variation is allowed before correction takes place.
This is another control that is often misunderstood.
Logic creates a zone around the core frequency. If the incoming vocal remains within that zone, the processor can leave it relatively alone. With a low tolerance, even relatively small pitch deviations can trigger correction. With a higher tolerance, the singer has more room to move around the target pitch before Logic intervenes. (Apple Support)
This makes Tolerance particularly useful when trying to preserve vibrato and natural vocal expression.
Imagine a singer holds a note and naturally vibrates slightly above and below the centre pitch. If you use very aggressive correction, Logic may attempt to flatten every tiny movement. The result can sound unnaturally rigid.
Increasing the tolerance gives the vocal more freedom.
Conversely, reducing tolerance can make the pitch correction much more assertive. When combined with a fast Response, this can contribute to the exaggerated, highly processed Auto-Tune sound.
A useful way to think about the two controls is:
Response = how quickly Logic corrects.
Tolerance = how much variation Logic allows before correcting.
That distinction makes it much easier to understand why changing the two settings together can radically alter the character of a vocal.
Correction Display
The Correction display provides visual feedback about how much pitch adjustment is taking place.
If the vocal is already very close to the intended notes, you should generally see relatively small corrections. If Logic is constantly making large adjustments, that is useful information: either the singer is substantially out of tune, the key/scale is wrong, or the vocal may require more detailed editing.
Do not assume that a larger amount of correction automatically means a better vocal. If the plug-in is working extremely hard on every note, it is worth going back to the recording and considering whether individual notes should be edited manually.
Reference and Global Tuning
Logic also provides Global Tuning and reference tuning controls.
With Global Tuning enabled, Pitch Correction uses the tuning settings established by the project, helping the corrected vocal remain consistent with the tuning of software instruments and other musical elements. (Apple Support)
For most projects, leaving Global Tuning enabled is the sensible choice.
The reference setting can become useful when working with a recording that is consistently sharp or flat. Rather than treating every note as an isolated problem, you can account for a broader tuning offset.
Detune
The Detune control allows the corrected output to be shifted slightly in pitch.
This is useful for creative purposes, particularly when you deliberately want to create a slightly detuned vocal layer or experiment with the relationship between multiple vocal parts.
It is also worth remembering that pitch does not always have to be corrected towards absolute perfection. A tiny amount of detuning between doubled vocals can actually make them sound wider and more interesting.
The Best Logic Pro Auto-Tune Settings for a Natural Vocal
There is no single "correct" Auto-Tune setting because every vocalist, recording and song is different. However, you can use the following as a sensible starting point.
For a natural vocal, start with the correct root note and scale, keep Neural Pitch Detection enabled and use a moderate Response rather than the fastest possible setting. Keep Tolerance reasonably generous so that vibrato and small expressive pitch movements remain intact.
The goal is not to make the vocal perfectly static. The goal is to make the performance sound in tune while still sounding like a human being.
This is particularly useful for acoustic music, rock, indie, singer-songwriter recordings and any production where the vocal needs to retain character.
After setting the plug-in, bypass it occasionally. If you can hear that the vocal is noticeably more accurate but cannot immediately hear an obvious processing effect, you are probably heading in the right direction.
How to Get the Classic Robotic Auto-Tune Sound
For the obvious Auto-Tune effect, take the opposite approach.
Set the correct key and scale, then use a very fast Response. Reduce Tolerance so that the processor reacts strongly to pitch deviations, and listen particularly carefully to sustained notes and transitions between notes.
The result should be considerably more obvious.
You may hear notes snapping towards their targets rather than smoothly sliding into them. Vibrato can become more rigid, and expressive pitch movements can become stepped or flattened.
That is not necessarily a problem.
If the purpose of the production is to create an artificial vocal character, those artefacts are part of the sound.
The classic effect became famous because producers stopped trying to hide the technology and instead made the pitch correction itself part of the performance.
Auto-Tune in Popular Music
One of the most famous examples is Cher's "Believe", which became closely associated with the heavily processed vocal sound at the end of the 1990s. Cher herself has subsequently discussed her pioneering use of Auto-Tune on the Grammy-winning song. (GRAMMY IQ)
The important lesson from "Believe" is that pitch correction can become a creative production decision rather than simply a repair tool. The vocal processing became part of the identity of the record.
Auto-Tune subsequently became deeply embedded in hip-hop, R&B and pop production, with artists such as T-Pain becoming particularly associated with using the technology as an obvious musical effect rather than attempting to disguise it. Contemporary artists including Kanye West and Future have also used heavily pitch-processed vocals as an important part of their sound. (GRAMMY GO)
The broader history of pitch processing is important because it demonstrates that there is no requirement for "good" vocal production to mean completely transparent correction. Sometimes the artificiality is precisely what makes the vocal interesting.
Pitch Correction vs Pitch Shifter in Logic Pro
It is also important not to confuse Pitch Correction with Logic Pro's Pitch Shifter.
They perform related but fundamentally different jobs.
Pitch Correction analyses the incoming vocal and attempts to move notes towards musically appropriate pitches according to a scale. Pitch Shifter, on the other hand, is designed to transpose the incoming signal by a specified musical interval or fine-tune it by cents. (Apple Support)
For example, you could use Pitch Shifter to move a vocal +12 semitones, effectively creating a version an octave above the original.
You could also move it -12 semitones to create an octave-down layer.
Or you could use a small shift such as +7 semitones to create a harmony-like effect, depending on the musical context.
Pitch Shifter provides controls for Semi Tones, Cents and Mix, along with timing and stereo-processing options. Logic also provides different algorithms designed for different types of source material, including Drums, Speech, Vocals, Manual and Pitch Tracking. (Apple Support)
This makes Pitch Shifter extremely useful alongside Pitch Correction.
For example, you could correct your main vocal with Pitch Correction, duplicate the vocal, shift the duplicate up or down with Pitch Shifter and blend the two together to create a synthetic harmony.

Creating Vocal Harmonies with Pitch Shifter
One particularly useful production technique is to combine a corrected vocal with pitch-shifted duplicates. Start with your main vocal and apply Pitch Correction normally. Then duplicate the vocal to another track and insert Pitch Shifter.
Depending on the melody and chord progression, experiment with shifting the duplicate by a suitable interval. You might try +3, +4, +7 or +12 semitones, although the correct interval depends entirely on the underlying harmony.

Do not simply assume that +3 semitones will always produce a musically correct harmony. Pitch shifting is mathematical; harmony is contextual. You can then reduce the level of the shifted vocal and pan it slightly away from the lead. Add a little reverb and you can create a much larger vocal sound without recording another performance.
For even more interesting results, create several copies with different pitch shifts and blend them quietly underneath the original.
Using Flex Pitch for More Detailed Vocal Tuning
Pitch Correction is excellent when you want real-time automatic correction, but sometimes you need much more control over individual notes.
This is where Flex Pitch becomes extremely useful.
Enable Flex Time in the Audio Track Editor and choose Flex Pitch. Logic can analyse the individual notes within a monophonic vocal recording, allowing you to make more detailed corrections to particular notes. Apple also provides a Pitch Correction slider within Flex Pitch for increasing or decreasing the amount of pitch adjustment applied to selected notes. (Apple Support)
This creates a useful two-stage workflow.
You can use Flex Pitch to deal with particularly problematic notes and then use Pitch Correction for the broader, real-time treatment.
Alternatively, you can use Flex Pitch almost like a manual vocal editor, correcting only the notes that actually need attention while leaving the rest of the performance untouched.
This approach is often preferable when the singer has a strong performance with only a handful of pitch problems.
Why Your Auto-Tune Might Sound Bad
If your Logic Pro vocal sounds strange after adding Pitch Correction, do not immediately assume the plug-in is broken.
The first thing to check is the key and scale.
If your song is in A minor but Pitch Correction is set to A major, the processor is being given the wrong set of possible target notes. Correcting the vocal more aggressively will not fix that fundamental problem.
Next, check Response. If it is extremely fast, you may simply be hearing the natural vocal transitions being replaced with abrupt pitch movements.
Then check Tolerance. If it is too low for the performance, natural vibrato and expressive pitch movement can become excessively controlled.
Finally, listen to the original vocal. If the singer is significantly away from the intended pitch, automatic correction may have to make a very large change. Extreme pitch correction can produce artefacts, particularly when attempting to move a poorly sung note a long distance.
Sometimes the best solution is simply to record the note again.
Don't Put Auto-Tune on Every Vocal the Same Way
One of the biggest mistakes beginners make is finding a setting they like and applying it to every vocal track.
Lead vocals, backing vocals, doubles and harmonies do not necessarily need identical treatment.
A lead vocal might benefit from relatively transparent correction, while backing vocals can often tolerate stronger processing. You might deliberately use more aggressive correction on a vocal double because the resulting differences in texture help it sit behind the lead.
You can also automate or change correction settings between sections of a song. A verse could remain relatively natural while the chorus becomes more heavily processed.
This is a particularly effective way of making pitch correction feel like part of the arrangement rather than an invisible technical repair.
A Simple Auto-Tune Workflow for Beginners
If you are completely new to pitch correction in Logic Pro, keep the workflow simple.
Start by recording a clean vocal and identifying the key of the song. Insert Pitch Correction on the vocal channel, set the Root Note and Scale correctly, and leave Neural Pitch Detection enabled.
Play the vocal back and listen to what Logic is doing before adjusting anything else. If the vocal already sounds reasonably natural, begin with a moderate Response and a relatively forgiving Tolerance.
If you want more correction, gradually make the Response faster and Tolerance lower.
If you want the classic robotic sound, push the Response considerably faster and experiment with lower Tolerance values until the pitch begins to snap noticeably between notes.
Once you have the overall correction working, use Flex Pitch to manually repair any individual notes that still sound problematic.
Then compare the processed and unprocessed versions regularly. Your ears are ultimately more important than any numerical setting.
Auto-Tune Settings Cheat Sheet
| Desired sound | Response | Tolerance | Approach |
|---|---|---|---|
| Natural vocal correction | Moderate | Moderate/high | Preserve expression and vibrato |
| Polished pop vocal | Moderate/fast | Moderate | Correct noticeable imperfections |
| Strong modern vocal effect | Fast | Low/moderate | Make correction clearly audible |
| Robotic Auto-Tune | Very fast | Low | Force rapid movement towards target notes |
| Experimental vocal | Very fast | Low | Deliberately exaggerate artefacts |
These are starting points rather than universal presets. The correct settings depend on the singer, melody, recording quality, tempo and desired production style. Apple's own documentation similarly notes that the optimum Response setting depends on factors such as singing style, vibrato, tempo and the accuracy of the original performance. (Apple Support)
Can Auto-Tune Make a Bad Singer Sound Good?
Pitch correction can certainly improve a weak performance, but it cannot magically turn any recording into a professional vocal. There are several reasons for this.
Pitch is only one aspect of singing. Timing, phrasing, dynamics, pronunciation, breath control, tone and emotional delivery are all equally important. A singer can be perfectly in tune while still delivering a lifeless performance.
Similarly, an Auto-Tune plug-in cannot necessarily rescue a recording containing severe background noise, clipping, excessive room ambience or a fundamentally unusable performance. Think of pitch correction as one tool in the production process, not a replacement for recording a good vocal.

The Importance of Recording Before Correcting
The better your original recording, the better your final Auto-Tune result is likely to be.
Record the vocalist in an acoustically suitable environment, avoid clipping the input and choose an appropriate microphone position. Give the singer a comfortable headphone mix and enough of their backing track to perform confidently.
A good performance with small tuning imperfections is exactly the sort of material where pitch correction excels.
If you are consistently relying on extreme pitch correction to rescue every vocal you record, it is worth investigating the recording process itself.
Speed Up Your Logic Pro Workflow with Editors Keys
Once you start producing vocals seriously, you quickly discover that music production involves an enormous number of keyboard commands. You are constantly opening plug-ins, zooming into regions, cutting takes, moving between windows, editing audio, adjusting tracks and navigating Logic's interface.
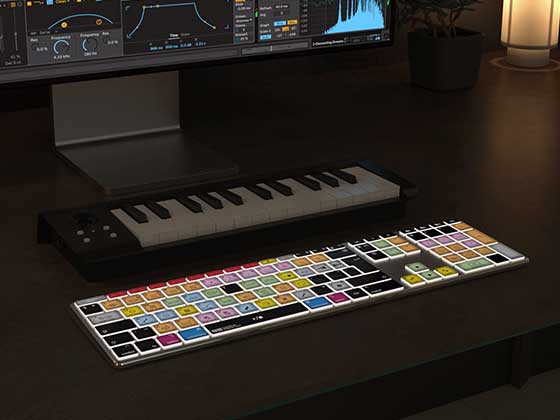
This is where a dedicated shortcut keyboard can make a surprisingly large difference to your workflow. Editors Keys produces shortcut keyboards and silicone keyboard covers designed specifically for creative software, with commonly used commands printed directly onto the keys. Instead of constantly trying to remember which keyboard combination performs a particular operation, you can see the shortcut directly in front of you.

For Logic Pro users, this can make the learning process considerably easier, particularly when you are still becoming familiar with the software. Rather than interrupting your creative process to search through menus or Google a keyboard shortcut, the command is physically mapped onto the keyboard.
The benefit becomes even greater once you start combining recording, editing, mixing and vocal production in the same session. Moving quickly between tools and commands means less time navigating menus and more time actually making music.
Editors Keys AB10 Air Wireless Backlit
The AB10 Air Wireless Backlit Shortcut Keyboard is designed for producers and editors who want a dedicated wireless workspace without sacrificing the visibility of the shortcuts.
The backlighting is particularly useful when producing in a darker studio environment, while the wireless design keeps your desk free from another cable.
For someone who moves between different computers or wants a cleaner studio setup, the wireless design can be particularly convenient.

Editors Keys AB10 Core USB-C Wired Backlit
If you prefer a wired connection, the AB10 Core Wired USB-C Backlit Shortcut Keyboard provides a direct USB-C connection while retaining the backlit shortcut layout.
A wired keyboard can be an excellent choice for a permanent studio setup where the keyboard is always going to be connected to your Mac.
Both approaches are designed around the same basic idea: put the shortcuts where you can see them and make them easier to learn through repetition.
Editors Keys Silicone Keyboard Covers
If you already love your existing Mac keyboard, you do not necessarily need to replace it with a dedicated keyboard.
Editors Keys also produces silicone keyboard covers that place software-specific shortcuts directly over the keys of compatible keyboards.
This is a useful option if you want the benefits of a shortcut reference without changing your existing keyboard hardware. The thin silicone design sits over the keyboard while providing a visual reference for the commands you use most frequently.
For beginners, this can be particularly helpful because you gradually begin to associate the physical key with its Logic Pro function. Eventually, you may find yourself using the shortcuts automatically without even looking down.
That is ultimately the goal of a good shortcut workflow: the keyboard should stop feeling like a reference guide and start feeling like an extension of your creative process.
Explore Editors Keys shortcut keyboards and silicone covers

Final Thoughts: Learn to Control Auto-Tune Rather Than Simply Turning It On
Auto-Tune and pitch correction are much more interesting when you stop thinking of them as a single "make vocals in tune" button.
Logic Pro 12.3 gives you a surprisingly capable set of tools for manipulating vocal pitch. The Pitch Correction plug-in can provide subtle correction, aggressive modern processing or deliberately robotic vocal effects, while Flex Pitch gives you more detailed control over individual notes. Pitch Shifter then opens up another world of creative possibilities, allowing you to create octave layers, artificial harmonies, detuned doubles and other pitch-based textures. (Apple Support)
The most important things to remember are to establish the correct key and scale, listen carefully to the original vocal, understand what Response and Tolerance are doing and avoid assuming that the most extreme setting is automatically the best one.
If you want a natural vocal, let the singer's performance breathe. If you want the unmistakable Auto-Tune effect, embrace the artificiality and use a fast response deliberately. There is no rule saying that pitch correction has to be invisible.
And once you start becoming comfortable with Logic Pro's tools, investing time in your keyboard workflow can make just as much difference as learning another plug-in. Being able to access editing commands quickly, without constantly stopping to search through menus, helps keep your attention on the music.
Whether you choose the Editors Keys AB10 Air Wireless Backlit, the AB10 Core Wired USB-C Backlit, or one of the company's silicone keyboard covers, having your most important shortcuts visible directly on the keyboard can help you work faster, memorise commands more naturally and spend more time doing what Logic Pro is ultimately there for: making music.