

Mastering can seem like one of the more complicated parts of music production when you are first getting started. You have recorded your instruments, edited your tracks, mixed everything together and finally got the song sounding the way you want. Then comes the question: what actually needs to happen before that mix is ready to become a finished release?
The good news is that you do not need an expensive collection of third-party plugins to get started with mastering. Logic Pro includes a comprehensive range of stock plugins that can be used to shape the tone, control dynamics, manage peaks, add harmonic character and increase the perceived loudness of a finished mix. Logic Pro also now includes Mastering Assistant, which can make the process considerably easier for anyone who is still learning how mastering works.
If you are producing your own music, learning to master in Logic Pro is a useful way to develop your ears and understand what happens to a song during its final stage of production. You may eventually choose to send your music to a professional mastering engineer, but knowing how to create your own master will help you understand what they are doing and give you greater control over your own releases.

What is mastering?
Mastering is the final stage of music production before a song is released. Mixing is primarily concerned with balancing individual tracks, such as vocals, drums, bass, guitars and synthesisers, whereas mastering deals with the completed stereo mix as a whole.
During mastering, you might make small adjustments to the overall frequency balance, use compression to control the dynamics, apply multiband compression to specific frequency ranges, add subtle saturation and use a limiter to control peaks and increase perceived loudness.
Mastering also involves checking the technical side of the recording. You want to make sure the track translates well between headphones, studio monitors, car speakers, phones and other playback systems. The final master should feel balanced and consistent without losing the dynamics and character of the original production.
It is worth remembering that mastering is not supposed to completely change your mix. If your song needs dramatic EQ changes or heavy compression to sound good, the problem may actually need to be addressed in the mix itself.

Does an unmastered song sound bad?
Not necessarily. A well-mixed song can already sound excellent before it reaches the mastering stage. Mastering is not a magic process that turns a bad mix into a professional recording.
However, a good master can make a finished mix feel more polished and cohesive. You might notice a tighter low end, clearer overall frequency balance, more consistent dynamics and an appropriate increase in perceived loudness.
The difference can sometimes be surprisingly subtle. In fact, that is often a good thing. If your mastering chain completely transforms the song, it is worth checking whether you are processing it too heavily.
A common misconception is that mastering simply means making a song as loud as possible. Modern streaming services use loudness normalisation, so an extremely loud master will not necessarily sound louder to the listener. Excessive limiting can also remove the punch and dynamics from a recording.
The aim is to create a master that sounds finished, balanced and competitive while still allowing the music to breathe.
Prepare your mix before mastering
Before reaching for your mastering plugins, make sure the mix itself is finished.
Listen through the whole song and check the relationship between the main elements. Is the vocal clear? Does the bass work with the kick drum? Are the guitars or synthesisers masking important parts of the mix? Does the chorus feel bigger than the verse?
If the bass is too loud, fix the bass track. If the vocal is buried, change the vocal level or processing. If your chorus needs more impact, adjust the mix rather than expecting the mastering chain to create it.
It is also useful to leave some headroom on the stereo output. You do not need to make your mix extremely loud before mastering. If you have been using a limiter on your stereo output throughout the mixing process, consider temporarily bypassing it and exporting a clean version of the mix.
Once you have a good mix, duplicate your Logic Pro project or save a new version before you begin making mastering changes. This gives you a safe version to return to if you decide that you have pushed the processing too far.
A simple Logic Pro mastering chain
There is no single mastering chain that works for every song, but a useful starting point could be:
Channel EQ → Compressor → Multipressor → Saturation/Excite → Limiter
You do not have to use every processor. Some songs may only need EQ and limiting, while others may benefit from more careful dynamic control.
The most important rule is that every plugin should have a reason for being there. Do not add a compressor because every mastering tutorial uses one. Add it because you have listened to the track and decided that some gentle dynamic control would improve it.
1. Channel EQ
Channel EQ is one of the most useful Logic Pro stock plugins for mastering because it allows you to make broad adjustments to the frequency balance of the entire song.
When mixing, you might use EQ to remove unwanted frequencies from an individual guitar or make a vocal more present. In mastering, you are listening to the combined effect of every instrument and considering how the entire frequency spectrum works together.
For example, a mix might have too much energy in the low-mid frequencies, making it sound muddy or congested. A small cut in this area can create more clarity. Alternatively, a track might feel slightly dull, in which case a gentle high-frequency boost could add some air and definition.
Mastering EQ generally benefits from restraint. Small changes can have a surprisingly large effect when they are being applied to an entire stereo mix.
Always compare your EQ changes with the original. If you have boosted the high end and the track suddenly sounds much better, reduce the volume of the processed version so that it matches the original. This prevents increased loudness from influencing your judgement.

Linear Phase EQ
Logic Pro also includes Linear Phase EQ, which can be useful for making delicate EQ adjustments during mastering.
Linear Phase EQ is designed to minimise the phase shifts associated with conventional EQ processing. This can make it useful for certain mastering applications, although it is not automatically better than Channel EQ.
It can introduce additional latency and may behave differently depending on the material, so experiment with both rather than assuming that Linear Phase EQ is always the correct choice for mastering.
2. Compressor
Logic Pro's Compressor can be used to gently control the dynamics of a finished stereo mix.
A mastering compressor is often used to add a small amount of cohesion to a production. For example, it can help the different sections of a song feel more connected and slightly reduce large changes in overall level.
Start with a relatively low ratio and a threshold that produces only modest gain reduction during louder sections. The exact settings depend on the song, so there is no universal mastering compressor preset.

The attack control determines how quickly compression responds to a signal. If the attack is extremely fast, the compressor can reduce the impact of transients such as kick drums and snares. A slower attack can allow those initial transients through before the compression begins.
The release controls how quickly the compressor stops reducing the signal. If it is too fast, you may hear obvious pumping. If it is too slow, the compressor may still be working when the next musical event arrives.
Listen to the groove and energy of the track rather than concentrating entirely on the gain-reduction meter.

3. Multipressor
Logic Pro's Multipressor is a multiband compressor, meaning that it allows you to compress different frequency ranges independently.
This is useful when a particular area of the mix is causing a dynamic problem but the rest of the track sounds fine.
Imagine that the low end becomes considerably louder every time the chorus arrives. A conventional compressor could respond to that increase in bass energy by compressing the entire mix. Multipressor allows you to concentrate the compression on the low-frequency band instead.

You can also use it to control aggressive upper frequencies, inconsistent low-mid frequencies or other parts of the spectrum that become problematic at certain points in the song.
However, Multipressor can be very easy to overuse. Heavy multiband compression can make a master sound flat and remove some of the natural movement from the music. Start with a small amount of processing and only add more when you can identify a specific problem.
4. Saturation and Excite
Saturation adds harmonic content to audio and can make a recording feel warmer, denser or more energetic. Logic Pro contains several plugins that can be used for saturation and distortion, and its Mastering Assistant also includes an Excite control designed to add saturation to the upper-mid frequencies.
Used subtly, this can add some extra presence and detail without requiring a large EQ boost. This can be useful if your mix sounds slightly sterile or lacks excitement in the upper-mid range.
However, saturation can quickly become harsh when applied to an entire master. If your mix already contains bright vocals, distorted guitars or aggressive cymbals, be particularly careful with high-frequency saturation.
A good test is to bypass the saturation after listening for a while. If you miss a little warmth or presence when it is removed, you may have found the right amount. If the difference is immediately obvious as distortion, reduce it.

5. Limiter
A limiter is commonly used towards the end of the mastering chain to control peaks and increase the overall level of the track.
Logic Pro's Limiter allows you to increase the input level while setting a maximum output ceiling. This can make the finished master sound louder and more consistent without allowing the highest peaks to exceed your chosen level. This is where it is particularly easy to go too far.
Increasing the limiter's gain can initially make the song sound more exciting, but excessive limiting can flatten the dynamics, reduce drum impact and introduce distortion. A loud master is not automatically a good master.
Pay particular attention to the loudest sections of the song. Listen to the kick drum, snare, vocal and other transient-heavy sounds. If they start losing their impact, reduce the amount of limiting.

Adaptive Limiter
Logic Pro also includes Adaptive Limiter, which provides another option for the final stage of a mastering chain.
Try both Limiter and Adaptive Limiter on your particular mix rather than assuming that one is always better. The correct choice will depend on the arrangement and how aggressively you want to control the peaks.
You do not need to use both.
6. Mastering Assistant
One of the most useful additions to the Logic Pro mastering workflow is Mastering Assistant.
Mastering Assistant is designed to analyse your completed mix and apply processing to areas such as EQ, dynamics, stereo width, saturation and loudness. For someone new to mastering, it provides an excellent starting point without requiring you to understand every parameter of a compressor or multiband compressor first.
It can be added to the stereo output once your mix is complete. Logic Pro analyses the project and creates a suggested mastering treatment that you can then adjust.
This does not mean you should simply turn Mastering Assistant on and immediately bounce the song. Treat it as a starting point and listen carefully to what it has changed.
Mastering Assistant includes different Character options, including Transparent, Clean, Valve and Punch. These give you different starting points for the overall character of the master. Punch, for example, can be particularly interesting for rock and other music where retaining impact is important.

Mastering Assistant's EQ
Mastering Assistant can analyse the tonal balance of your mix and apply corrective EQ.
This can be useful if you are still learning how to identify frequency problems by ear because it gives you a visual and audible starting point.
You can then make your own adjustments. If the result sounds too bright, too dark or too heavy in the low end, you can modify the processing rather than simply accepting the automatic result.
Do not feel that your frequency spectrum needs to look perfectly flat. Different genres naturally have different frequency balances, and a great master does not need to produce a perfectly flat analyser display.
Mastering Assistant's Excite control
The Excite section is designed to add saturation to the upper-mid frequencies, creating additional harmonics and helping the mix sound richer and more detailed.
This can be particularly useful when a mix feels slightly dull or lacks presence.
As with manual saturation, restraint is important. If your mix already has plenty of high-frequency energy, adding more could make the master sound harsh.
Mastering Assistant and loudness
Mastering Assistant also provides control over the loudness of your finished track.
You will often see LUFS mentioned when discussing streaming and mastering. LUFS is a measurement related to perceived loudness and can be useful for understanding how your track compares with other releases.
However, there is no requirement for every song to hit exactly the same LUFS value. Logic Pro's Mastering Assistant uses around -14 LUFS-I as a typical centre point for its loudness control, but different genres and productions can benefit from different levels of dynamic range.
Streaming services also use loudness normalisation, so pushing a track to extreme loudness is not necessarily going to give you an advantage.
Concentrate on how the song actually sounds. Use LUFS and peak meters as useful information rather than allowing a number to dictate your entire mastering process.

A simple Logic Pro mastering workflow for beginners
If you are completely new to mastering, keep your first few attempts simple.
Start by listening to your finished mix without any mastering processing. Identify anything that sounds obviously unbalanced and fix those problems in the mix first.
Add Channel EQ and make small, broad adjustments if the overall frequency balance needs some work. Follow this with gentle Compressor processing if the mix would benefit from a little more cohesion.
If you have a specific problem in one frequency range, try Multipressor rather than compressing the entire mix. Add a small amount of saturation or Excite if you want additional harmonic character.
Finally, use Limiter or Adaptive Limiter to control the peaks and raise the overall level.
Alternatively, start with Mastering Assistant and use its processing as your foundation. You can then decide whether you actually need additional plugins.
How do you know when your master is finished?
Knowing when to stop can be harder than knowing what plugins to use.
When you have been working on the same song for hours, your ears become accustomed to the mix. Take a break and return to it later. Listen at a low volume as well as at your normal monitoring level, and check the track on headphones and speakers if possible.
Compare your master with a few professionally released songs in a similar style. Do not simply try to make yours as loud as the reference track. Instead, listen to the overall tonal balance, bass, vocal clarity, dynamics and stereo image.
Most importantly, compare your mastered and unmastered versions at a similar loudness. If the mastered version only sounds better because it is louder, you may be judging the volume increase rather than the quality of the processing.
A good master should still sound like your song. It should feel more finished and controlled without removing the character of the mix.
Mastering is not a replacement for a good mix
It is worth repeating that mastering cannot solve every problem.
If your vocal is too quiet, fix the vocal. If your bass is overpowering the kick drum, work on the bass and kick in the mix. If your chorus does not have enough impact, look at the arrangement, levels and automation.
Trying to solve major mixing problems with a mastering chain can result in extreme processing that affects every element of the song.
The better the mix you send into the mastering stage, the less work your mastering plugins should need to do.
Speed up your Logic Pro workflow with Editors Keys
Once you start working regularly in Logic Pro, keyboard shortcuts can make a major difference to your workflow. Recording, editing, arranging and mixing can involve hundreds of commands, and constantly searching through menus or reaching for the mouse can interrupt your creative process.
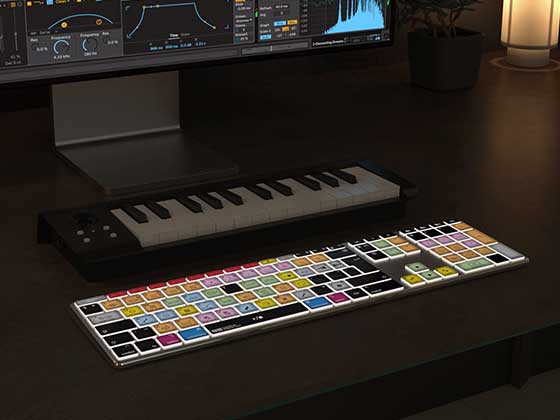
Editors Keys shortcut keyboards are designed to make these commands easier to learn by printing the relevant software shortcuts directly onto the keys. This means you can see the command you need while you work, helping with both faster editing and memorisation of shortcuts.
For Logic Pro users, the Editors Keys AB10 Air Wireless Backlit Shortcut Keyboard provides a wireless option with backlighting, while the AB10 Core Wired USB-C Backlit Shortcut Keyboard provides a wired USB-C alternative.
Editors Keys also produces silicone shortcut keyboard covers, which allow you to add software-specific shortcuts to a compatible existing keyboard. They are particularly useful if you already like your current keyboard but want the shortcuts clearly displayed in front of you.
The more shortcuts you learn, the less time you need to spend navigating menus. That can make a noticeable difference when recording, editing, mixing and mastering, particularly if you are working on music for several hours at a time.

Can you really master a song using only Logic Pro?
Absolutely. Logic Pro contains all of the fundamental tools you need to learn the basics of mastering, including EQ, compression, multiband compression, saturation, limiting and metering. With the addition of Mastering Assistant, it is also easier than ever for beginners to get a useful starting point.
You do not need a huge collection of third-party mastering plugins to get started. In fact, learning how to use Logic Pro's stock plugins properly can teach you more about mastering than immediately buying a collection of specialised processors.
Start with the basics: make sure your mix is good, use EQ to balance the overall frequency spectrum, apply gentle compression when necessary, use Multipressor for specific frequency-related problems and use a limiter to control the final peaks. Then experiment with Mastering Assistant and its different character, EQ, Excite and loudness controls.
Most importantly, trust your ears. The purpose of mastering is not to make every song louder or make every frequency graph look the same. It is about taking a finished mix and making sure it sounds balanced, controlled and ready to be shared with the world.
With Logic Pro's stock plugins and a good understanding of what each processor is actually doing, you already have everything you need to start mastering your own music.