If you're starting a podcast, launching a YouTube channel, building a home studio, or just want to improve the quality of your recordings, one of the biggest challenges you’ll face is background noise. Whether it’s traffic outside your window, a humming appliance, or room echo, unwanted sound can make your recordings feel amateurish—no matter how good your content is.
In this guide, we’ll walk through the best techniques and tools to eliminate background noise, from microphone positioning and room treatment, to audio plugins like EQ and noise gates. Plus, we’ll look at how sound behaves in a room, and what you can do to control it.
Why Background Noise Happens – and How Sound Travels
To fix poor audio, it’s important to understand how sound behaves. Sound is a vibration that travels through air in waves. When these waves reach surfaces—walls, ceilings, furniture—they can do one of three things:
-
Reflect (bounce off hard surfaces like glass, tiles, or concrete)
-
Absorb (soak into soft materials like curtains, cushions, and acoustic foam)
-
Diffuse (scatter in different directions via irregular surfaces like bookshelves)
The Problem with Reflection
When sound waves bounce off walls or ceilings, they can interfere with the direct signal from your voice to the microphone. This creates echo, reverb, and room tone, all of which make your audio sound less clear and more amateur.

What You Can Do
To reduce reflections and absorb sound:
-
Use acoustic panels or foam on reflective surfaces, especially opposite the microphone.
-
Hang heavy curtains over windows and add rugs or carpets to hardwood floors.
-
Add irregular objects like bookshelves, cushions, or wall hangings to help diffuse sound.
-
Avoid large, bare, flat surfaces – even recording at an angle to a wall can help reduce reflections.
Your goal is to create a space where your voice travels cleanly to the mic without bouncing around the room.

Create the Right Recording Environment
Even without professional soundproofing, you can make a big difference with a few simple adjustments:
-
Choose a quiet room – away from traffic, boilers, or appliances.
-
Record at the right time of day – early mornings or late evenings tend to be quieter.
-
Seal gaps – use draft excluders and foam strips on doors to reduce outside noise.
-
Turn off electronics – fans, fridges and lights can all emit low-level hums picked up by condenser mics.
The less noise your mic picks up, the less you’ll need to fix later.
Use the Right Microphone – and Use It Properly
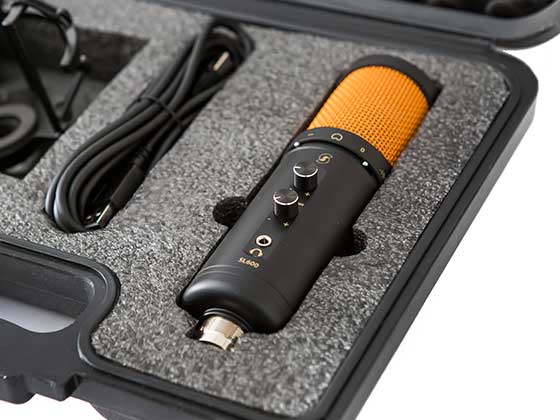
The Editors Keys SL600 USB Microphone
If you’re serious about high-quality recording, a good microphone is essential. The Editors Keys SL600 USB Studio Microphone offers professional-level sound in a plug-and-play format, making it ideal for podcasters, musicians and streamers.
-
Cardioid polar pattern focuses on your voice and rejects unwanted background noise.
-
Studio-grade components offer clarity, warmth and a very low noise floor.
-
USB connection for quick, driver-free setup with any major DAW. Simply plug in and play!
Microphone Placement Tips
-
Stay close – 6–12 inches is ideal to maximise the direct sound and reduce ambient pickup.
-
Be mindful of the proximity effect – moving closer increases bass, which can add warmth but may become boomy.
-
Use a pop filter to stop plosives (p, b, t sounds) from distorting your audio.
-
Angle slightly off-axis to reduce harsh consonants and sibilance.
A great mic used badly will still sound poor. Technique is equally as important as gear.
Recording Techniques to Reduce Noise
Monitor Your Input Levels
Record at a healthy level: loud enough to avoid noise when boosting, but not so loud that you clip. Aim for peaks around -6dB.
Wear Closed-Back Headphones
Using speakers during recording causes sound bleed into the mic. Always monitor with closed-back headphones to prevent this.
Minimise Movement
Every rustle, bump or shift in a chair can be picked up—especially by condenser mics. Sit still, stay focused, and consider a shock mount for your mic.
Use Audio Plugins to Clean Up in Post
Even with the best prep, some unwanted noise may remain. That’s where your audio plugins come in.
Noise Gates
A noise gate silences your signal when it drops below a certain level—great for cutting out background hiss or hum between speaking.
-
Set the threshold just above your noise floor.
-
Adjust attack and release times to make the gate sound natural.
EQ (Equalisation)
EQ allows you to shape and clean up your audio by adjusting frequency bands:
-
High-pass filter (cut below 80–100Hz) removes low-end rumble.
-
Notch out boxy frequencies (200–500Hz) to clean up room muddiness.
-
Tame harsh sibilance or nasal tones around 2kHz–5kHz.

De-Essers
A de-esser is an EQ-based tool that reduces sharp “s” and “sh” sounds. Essential for close mic recordings or naturally sibilant voices.
Noise Reduction Plugins
Tools like iZotope RX, Waves NS1, or Accusonus ERA Bundle can intelligently remove constant noise such as hiss, hum, or environmental sound, without ruining your vocal clarity.
Upgrade Your Workflow with Editors Keys
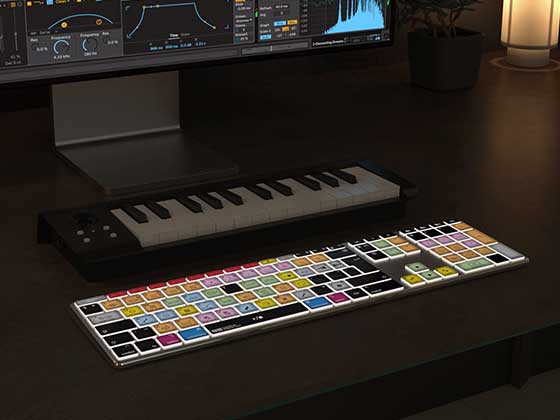
If you're editing regularly, an Editors Keys shortcut keyboard can vastly improve your speed and productivity. Whether you’re using Adobe Audition, Logic Pro, Audacity or Pro Tools, our keyboards are designed to help you:
-
Edit faster and more accurately
-
Quickly access noise reduction, EQ and gain tools
-
Focus on creativity, not menus
Final Thoughts: Clean Audio Starts with Smart Choices
Background noise isn’t just a technical issue—it’s a barrier to professional, polished content. Whether you’re recording a podcast, interview, voiceover or track, clarity matters.
By understanding how sound behaves, treating your space, and using the right microphone and audio tools, you can capture audio that’s clean, engaging, and broadcast-ready.
Explore the full range of recording gear, professional microphones like the SL600, and editing keyboards at www.editorskeys.com – and make your recordings sound as good as your ideas deserve.

