
Whether you're tightening up a live drum performance, correcting the timing of a vocal, locking bass to the kick drum, or experimenting with creative sound design, Elastic Audio is one of the most powerful editing tools available in Avid Pro Tools.
Rather than cutting audio into dozens of tiny pieces and manually moving clips around, Elastic Audio allows you to stretch, compress and reposition audio while preserving the natural sound of the original recording. It's one of the reasons Pro Tools remains the industry standard in professional recording studios, post-production facilities and film scoring environments.
If you've never used Elastic Audio before, it can initially seem intimidating. Fortunately, once you understand how it works, it quickly becomes an essential part of your editing workflow.
In this guide, we'll explain:
-
What Elastic Audio is
-
How Elastic Audio works
-
When you should use it
-
The different Elastic Audio algorithms
-
How to enable and use Elastic Audio
-
Practical editing examples
-
Tips for getting professional results
-
Common mistakes to avoid
Let's dive in.

What Is Elastic Audio in Pro Tools?
Elastic Audio is Pro Tools' built-in time-stretching and timing correction system. Instead of permanently altering your audio, it allows you to adjust the timing of recorded performances without changing their pitch (unless you want to). Each DAW has a similar function, like Flex-Time in Logic Pro, Ableton Live's Warping Engine and Cubase/Nuendo's AudioWarp and Hitpoint tools
Imagine recording a guitarist who rushes slightly during the chorus. Rather than asking them to record the part again, you can simply move individual notes into perfect time.
The same applies to:
-
Vocals
-
Drums
-
Bass
-
Acoustic guitar
-
Electric guitar
-
Piano
-
Strings
-
Brass
-
Percussion
-
Dialogue
-
Foley
-
Sound effects
Essentially, Elastic Audio lets you reshape timing after the recording has already happened.
Why Is Elastic Audio So Useful?
Before Elastic Audio was introduced, timing corrections involved manually cutting recordings into hundreds of tiny clips.
Editors would then:
-
Separate clips
-
Slide them individually
-
Crossfade every edit
-
Hope there weren't any audible clicks
Not only was this incredibly time-consuming, but it also made projects much more difficult to manage. Elastic Audio changes this completely. Instead of editing hundreds of clips, you simply place Warp Markers exactly where timing adjustments are needed.
Pro Tools intelligently stretches the surrounding audio while keeping everything sounding as natural as possible.
The result is:
-
Faster editing
-
Fewer cuts
-
Cleaner sessions
-
Better sounding timing corrections
-
Non-destructive editing

What Can Elastic Audio Be Used For?
Elastic Audio has dozens of practical applications across music production, podcast editing and post-production.
Tightening Live Drum Performances
Perhaps its most common use. Even excellent drummers naturally fluctuate slightly in tempo, but using Elastic Audio, you can align kick drums, snares and toms with the session grid while preserving the feel of the performance.
Rather than making everything perfectly robotic, many engineers simply tighten obvious timing inconsistencies.
Correcting Vocal Timing
Sometimes singers begin phrases slightly early or late. Elastic Audio allows you to reposition words, syllables or breaths so they sit perfectly within the song. This is especially useful when layering multiple vocal takes. Backing vocals can be aligned much more quickly than editing dozens of separate clips.
Locking Bass to Drums
Bass and kick drum need to work together. If bass notes arrive slightly behind the beat, the groove can feel loose. Elastic Audio allows individual bass notes to be nudged into position without affecting pitch, the result is a tighter, more professional rhythm section.
Tightening Guitar Performances
Rhythm guitars often benefit from subtle timing adjustments. Whether you're editing acoustic guitar, clean electric or heavily distorted rhythm parts, Elastic Audio can improve consistency while maintaining a natural feel. Double-tracked guitars also become much easier to align.
Adjusting Dialogue
Elastic Audio isn't just limited to music.
Film editors frequently use it to:
-
Tighten dialogue
-
Improve ADR timing
-
Match replacement dialogue
-
Synchronise speech with picture
Creative Sound Design
Elastic Audio is equally useful for experimentation.
You can dramatically stretch sounds to create:
-
Ambient textures
-
Drones
-
Cinematic impacts
-
Risers
-
Reverse effects
-
Glitch-style edits
Combined with reverb and delay, stretched recordings can become entirely new soundscapes.
How Does Elastic Audio Work?
Elastic Audio analyses your recording and identifies important events called analysis markers.
These markers detect transients such as:
-
Drum hits
-
Guitar attacks
-
Piano notes
-
Vocal consonants
Once analysed, you can add Warp Markers. Warp Markers tell Pro Tools exactly where you want the audio to move; Rather than moving the entire recording, Pro Tools stretches the surrounding audio so everything remains connected.
This creates smooth timing adjustments without needing dozens of edits.

Elastic Audio Is Non-Destructive
One of Elastic Audio's biggest advantages is that it's largely non-destructive.
Your original recording remains untouched.
You can:
-
Remove Warp Markers
-
Reset edits
-
Disable Elastic Audio
-
Try different algorithms
This encourages experimentation because you're never permanently changing your original recording unless you choose to commit the edits later.

Understanding the Elastic Audio Algorithms
One of the first things you'll notice is that Elastic Audio offers several different processing algorithms. Each is designed for different types of material, choosing the correct one makes a significant difference to sound quality.
Polyphonic
Best for:
-
Full mixes
-
Piano
-
Guitar
-
Chords
-
Complex recordings
Polyphonic works well whenever multiple notes occur simultaneously. It's one of the most commonly used modes for musical performances.
Rhythmic
Designed specifically for:
-
Drums
-
Percussion
-
Loops
-
Rhythm instruments
Rhythmic preserves transients extremely well, helping drums remain punchy after timing adjustments.
Monophonic
Ideal for single-note instruments, including:
-
Bass
-
Lead vocals
-
Saxophone
-
Trumpet
-
Solo instruments
Because only one note plays at a time, this algorithm can preserve pitch and clarity exceptionally well.
Varispeed
Varispeed behaves like changing the speed of analogue tape.
Unlike the other algorithms, both timing and pitch change together.
Slowing audio lowers its pitch.
Speeding audio raises it.
This is excellent for vintage tape effects and creative production techniques.
X-Form
X-Form offers the highest quality processing.
Instead of real-time processing, it performs offline rendering.
It's slower but generally produces the cleanest results for significant timing adjustments.
Many engineers edit using another algorithm before switching to X-Form when they're ready to finalise the session.

How to Enable Elastic Audio
Getting started is straightforward.
Step 1: Open Your Session
Load the Pro Tools project containing the audio you'd like to edit.
Step 2: Locate the Elastic Audio Plug-in Selector
Each audio track contains an Elastic Audio selector.
If it isn't visible:
-
Open the Edit window.
-
Choose View > Edit Window Views.
-
Enable Elastic Audio if required.
You'll see a small Elastic Audio button or selector on each audio track.
Step 3: Choose an Algorithm
Click the Elastic Audio selector.
Choose the algorithm that best matches your recording:
-
Rhythmic
-
Polyphonic
-
Monophonic
-
Varispeed
-
X-Form
Pro Tools will begin analysing the audio automatically.
Depending on the session size, this may take a few moments.

Switching to Warp View
After analysis is complete:
-
Open the Track View selector.
-
Change from Waveform to Warp.
You'll now see analysis markers across your recording.
These represent the transient points Pro Tools has detected.
Creating Warp Markers
Now the real editing begins.
Simply:
-
Click near the transient you wish to move.
-
Create a Warp Marker.
-
Drag it left or right.
The surrounding waveform stretches naturally.
Unlike moving clips manually, the audio remains continuous.
This makes edits significantly faster.
Quantising Audio Automatically
Elastic Audio becomes even more powerful when combined with Pro Tools' Quantise functions.
Instead of dragging every note individually, you can automatically align performances to:
-
Quarter notes
-
Eighth notes
-
Sixteenth notes
-
Swing grids
-
Groove templates
This is especially useful for tightening drum recordings recorded without a click.
Editing Groups of Tracks
Multi-microphone recordings require special care.
For example:
-
Drum kits
-
Choirs
-
Live bands
Always edit grouped tracks together.
This prevents microphones drifting out of phase, which can introduce comb filtering and weaken the overall sound.
Pro Tools makes grouped Elastic Audio editing straightforward, helping maintain phase relationships across every microphone.
When Should You Commit Elastic Audio?
During editing, leave Elastic Audio active.
Once you're completely satisfied with the timing adjustments, you can Commit or Render the processing.
This reduces CPU usage and ensures the edits remain consistent across different systems.
Many engineers only commit once all timing changes have been approved.
Common Beginner Mistakes
If you're new to Elastic Audio, avoid these common pitfalls.
Using the Wrong Algorithm
Applying the Rhythmic algorithm to vocals, or Monophonic to drums, often introduces unwanted artefacts.
Always choose the algorithm that best suits your source material.
Over-Editing
Perfect timing isn't always musical.
Some natural variation gives performances character and energy.
Aim to improve consistency rather than making every note mathematically perfect.
Ignoring Artefacts
Large stretches can introduce:
-
Metallic sounds
-
Warbling
-
Smearing
-
Unnatural transients
If you hear these issues, try:
-
Using a different algorithm
-
Adding additional Warp Markers
-
Making smaller edits
-
Switching to X-Form for final rendering
Forgetting About Phase
When editing multi-mic recordings such as drum kits, always make identical timing adjustments across every related track.
Otherwise, the microphones may no longer align correctly.
Tips for Better Elastic Audio Results
To get the most natural results:
-
Record performances as tightly as possible before editing.
-
Make small corrections instead of dramatic timing changes.
-
Zoom in when placing Warp Markers for greater accuracy.
-
Use the correct algorithm for every instrument.
-
Compare your edits with the original performance regularly.
-
Listen for artefacts after every major adjustment.
-
Commit Elastic Audio only once you're certain the edits are finished.
Remember that Elastic Audio works best as a tool to enhance a good performance rather than replace it entirely.
Speed Up Your Pro Tools Workflow with Editors Keys
Learning Elastic Audio is a fantastic way to improve your editing skills, but it's only one part of working efficiently in Pro Tools. Professional engineers also rely heavily on keyboard shortcuts to keep their hands on the keyboard and maintain their creative flow.
Rather than constantly reaching for menus, shortcuts let you switch tools, zoom around your session, separate clips, create fades, navigate tracks, adjust selections and edit audio in seconds. Over the course of a project, these small time savings quickly add up.
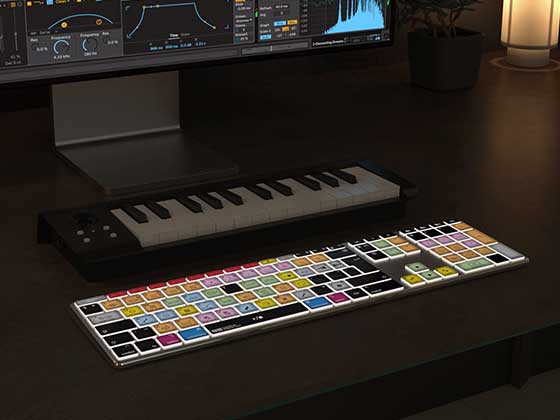
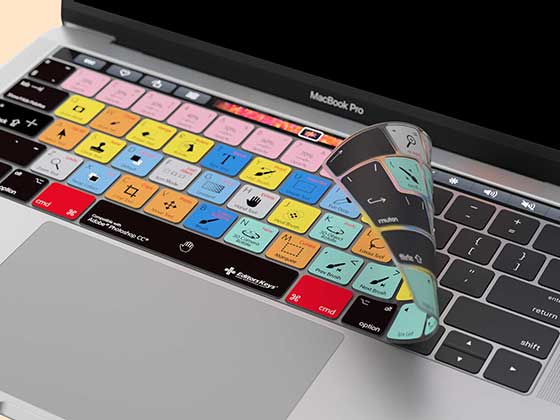
That's where Editors Keys Pro Tools shortcut keyboards and keyboard covers can make a real difference.
Every key is clearly labelled with its corresponding Pro Tools shortcut, colour-coded by category, making it much easier to learn the software as you work. Instead of trying to memorise dozens—or even hundreds—of key combinations, the shortcuts are always visible right in front of you.

Whether you're a beginner learning Pro Tools for the first time or an experienced engineer looking to work faster, Editors Keys keyboards and keyboard covers can help you:
-
Learn Pro Tools shortcuts naturally while you edit.
-
Reduce time spent searching through menus.
-
Speed up common editing tasks.
-
Keep your workflow focused on the session rather than the interface.
-
Build long-term shortcut memory through daily use.
For editors who spend hours recording, comping, timing, mixing or mastering, those saved seconds soon become minutes—and eventually hours—across larger projects.
Final Thoughts
Elastic Audio is one of the most valuable editing features in Pro Tools, giving you precise control over timing while keeping your workflow fast, flexible and non-destructive. From tightening drum performances and aligning vocals to synchronising dialogue and creating experimental sound design, it's a tool that can dramatically improve both the quality and efficiency of your productions.
Although it may seem complex at first, the fundamentals are straightforward: choose the right algorithm, let Pro Tools analyse the audio, place Warp Markers where needed, and make subtle adjustments while listening carefully for natural results. With practice, you'll be able to make timing corrections that are virtually impossible to detect.
Pair that knowledge with a solid understanding of Pro Tools keyboard shortcuts, and you'll be able to navigate sessions, edit audio and use features like Elastic Audio far more efficiently. Whether you're recording your first demo or working on professional studio productions, mastering Elastic Audio is a skill that will continue to pay dividends on every project you create.