When it comes to crafting a professional video edit, seamless transitions are a hallmark of great storytelling. Whether you're producing a short film, a YouTube video, a commercial, or a documentary, how you move from one shot to another can elevate your edit from amateur to cinematic.
In this guide, we’ll explore the most effective types of transitions—match cuts, J & L cuts, and cross dissolves—and how to use them for maximum visual impact. Plus, we’ll show you how Editors Keys keyboards and covers can speed up your workflow and help you master these techniques more efficiently.
Why Seamless Transitions Matter
Transitions are more than just visual flair—they’re a key part of the storytelling process. A well-executed transition keeps viewers engaged, maintains narrative flow, and ensures your edits feel polished and intentional. Poor transitions, on the other hand, can feel jarring, disjointed, and unprofessional.
Mastering a few core transition types will help you build stronger edits, regardless of the software you use—whether it's Adobe Premiere Pro, Final Cut Pro, DaVinci Resolve, or Avid Media Composer.
1. Match Cuts: Visual Continuity and Creative Precision
What is a Match Cut?
A match cut links two visually similar shots together, creating a smooth and often symbolic transition between scenes. It can be based on composition, movement, shape, or even lighting.
When to Use:
-
To draw a visual or thematic parallel
-
To maintain continuity across a scene change
-
For creative or artistic transitions (e.g. a door opening in one location cuts to a door opening in another)

How to Achieve a Match Cut:
-
Plan During Filming: Think about how two shots might visually connect, even if they are in different locations or times.
-
Match the Movement or Framing: Align subjects in the same area of the frame or match a similar movement.
-
Use Precise In and Out Points: In your editing software, trim each clip to the exact frame where the motion or position lines up.
-
Fine-tune with Keyframes if Necessary: Add keyframes to smooth any jarring visual shifts.
Tip: Use the razor tool and precision trimming shortcuts (e.g. “Q” and “W” in Premiere Pro) to quickly isolate and align shots.
2. J and L Cuts: Perfecting Audio Transitions
What are J and L Cuts?
These are audio-based transitions where the sound from the next scene begins before the video cuts (J-cut) or continues after the video has changed (L-cut). Named after the shape they form on the editing timeline.
When to Use:
-
To create more natural conversations
-
To smooth over scene changes
-
To lead the audience emotionally into the next scene

How to Create a J or L Cut:
-
Unlink Audio and Video (if necessary): In your timeline, unlink the audio from the video clip.
-
Drag the Audio Clip: Move the audio from the second clip under the first video clip (for a J-cut), or extend the audio from the first clip under the second video (for an L-cut).
-
Adjust Fade Handles: Add fade-ins or outs for a smoother blend.
-
Preview with Headphones: Ensure audio feels natural and doesn’t clip or overlap awkwardly.
Pro Tip: Use audio gain shortcuts and crossfade effects to finesse your transitions for broadcast-level polish.

3. Cross Dissolves: Classic and Cinematic
What is a Cross Dissolve?
A cross dissolve gradually blends one image into another. It’s one of the most traditional video transitions and often used to show the passage of time or a soft emotional shift.
When to Use:
-
Between scenes with similar tones
-
To indicate time passing
-
In music videos or dreamy sequences

How to Add a Cross Dissolve:
-
Place Two Clips Adjacent on the Timeline: Make sure they don’t overlap initially.
-
Apply the Cross Dissolve Effect: In most editors, you’ll find this in the ‘Transitions’ panel (e.g. “Effects > Video Transitions > Dissolve” in Premiere Pro).
-
Adjust the Duration: Click and drag to shorten or lengthen the dissolve.
-
Use with Subtlety: Too many dissolves can feel outdated—use sparingly and with purpose.
Shortcut Tip: Keyboard shortcuts like Cmd + D (Mac) or Ctrl + D (Windows) in Premiere apply the default transition instantly—great for speeding things up.
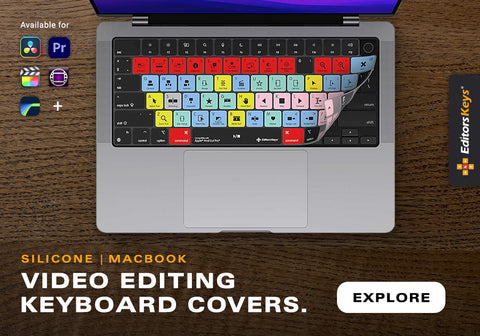
Speed Up Your Editing with Editors Keys Keyboards and Covers
Learning these transitions is only half the battle. The other half is executing them quickly and efficiently. That’s where Editors Keys shortcut keyboards and silicone keyboard covers can revolutionise your editing workflow.
Why Use Editors Keys?
✅ Instant Shortcut Access – Every major video editing shortcut is printed directly onto your keyboard or cover. No more stopping to Google how to ripple delete or slip trim.
✅ Edit Faster – With visual cues at your fingertips, you’ll drastically reduce the time spent on repetitive actions like cutting, trimming, or applying effects.
✅ Learn by Doing – Repetition is key. Seeing the shortcuts daily helps you memorise them naturally over time.
✅ Professional Look and Feel – Designed for editors, by editors. Our products work with Adobe Premiere Pro, Final Cut Pro, DaVinci Resolve, and more.
Whether you're just starting out or looking to fine-tune your transitions for client work, the right tools make all the difference.

Final Thoughts
Seamless transitions are a crucial skill for any editor striving for professional results. Whether you're building emotional momentum with a J-cut, creating visual symmetry with a match cut, or enhancing storytelling with a cross dissolve, mastering transitions will transform your edits.
And with Editors Keys keyboards and shortcut covers, you’ll not only work faster but also become a more intuitive and confident editor.
Ready to upgrade your editing?
Explore our full range of shortcut keyboards and covers for video editors at www.editorskeys.com.